Stage 3: Metadata Mapping
Upload to Carrot Scan Report
Upload Scan Report
-
Log into Carrot:
-
Upload Scan Report:
- Click Scan Reports Tab.
- Click New Scan Report Upload option.
- Choose Data Partner - from drop-down list.
- Choose Dataset - from drop-down list.
- Choose Visibility: Public or Restricted
- Public = All registered users of Carrot can view the scan report.
- Restricted = Only defined/specific registered users of CARROT can view the scan report.
-
Define Editors (users allowed to edit the dataset)
-
Define Viewers (users allowed to view a ‘restricted’ dataset)
-
Create the Scan Report Name.
-
Choose WhiteRabbit ScanReport file location for upload.
-
Choose Data Dictionary file location for upload.
-
Check all items entered are correct.
-
Click ‘Submit’ button to upload the Scan Report.
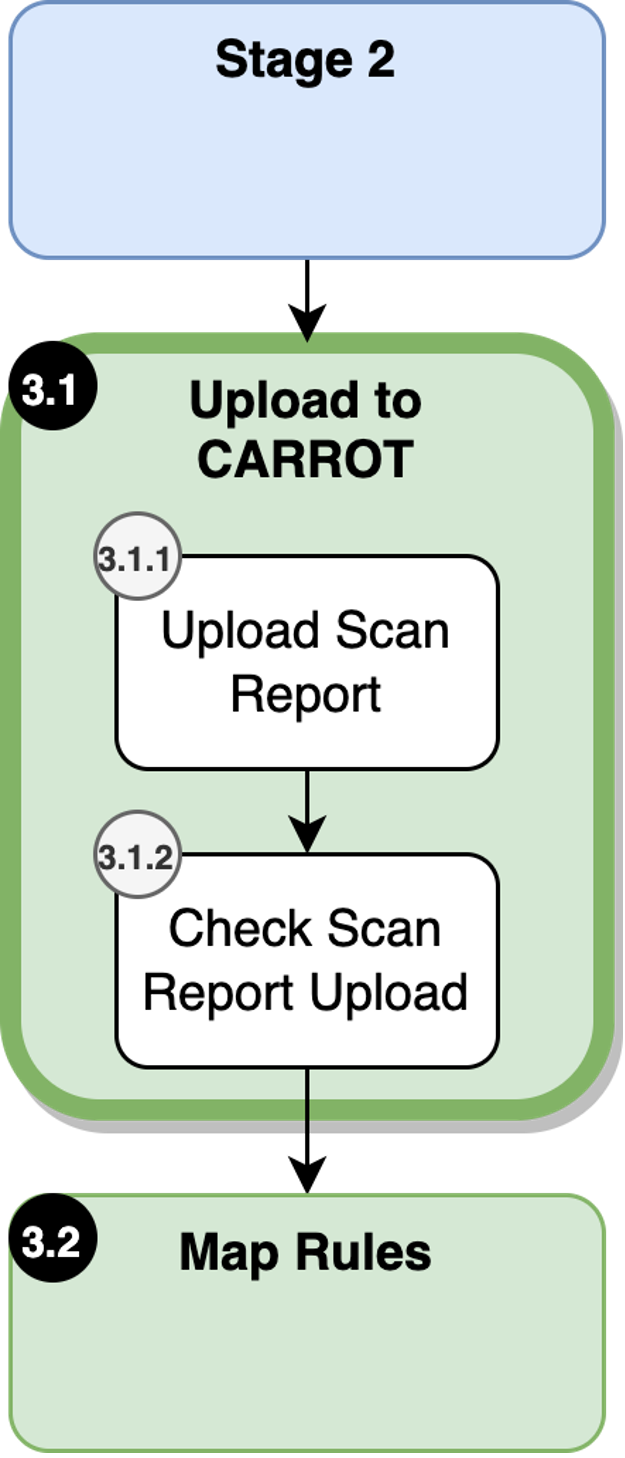
Figure 15: Upload Mapping in Metadata Mapping.
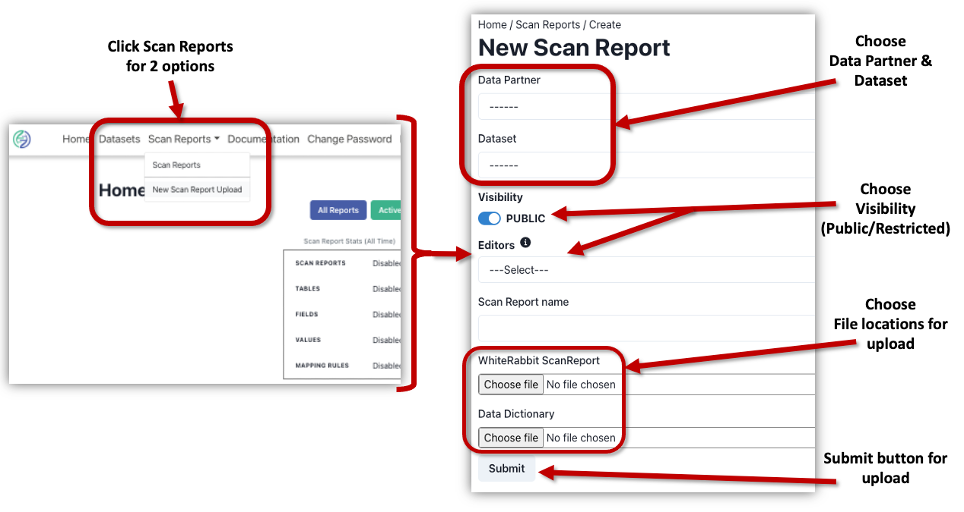
Figure 16: Example of CARROT Software Tool Screens for New Scan Report Upload.
Check the Scan Report Upload
While logged into the Carrot tool:
- Click Scan Reports.
- Select Scan Reports tab.
- Check the progress of your Scan Report upload – it will show one of the following three (see diagram):
- Upload Complete
- Upload In Progress
- Upload Failed
- Refresh the web browser to check on upload progress.

Figure 17: Upload to Carrot in Metadata Mapping.
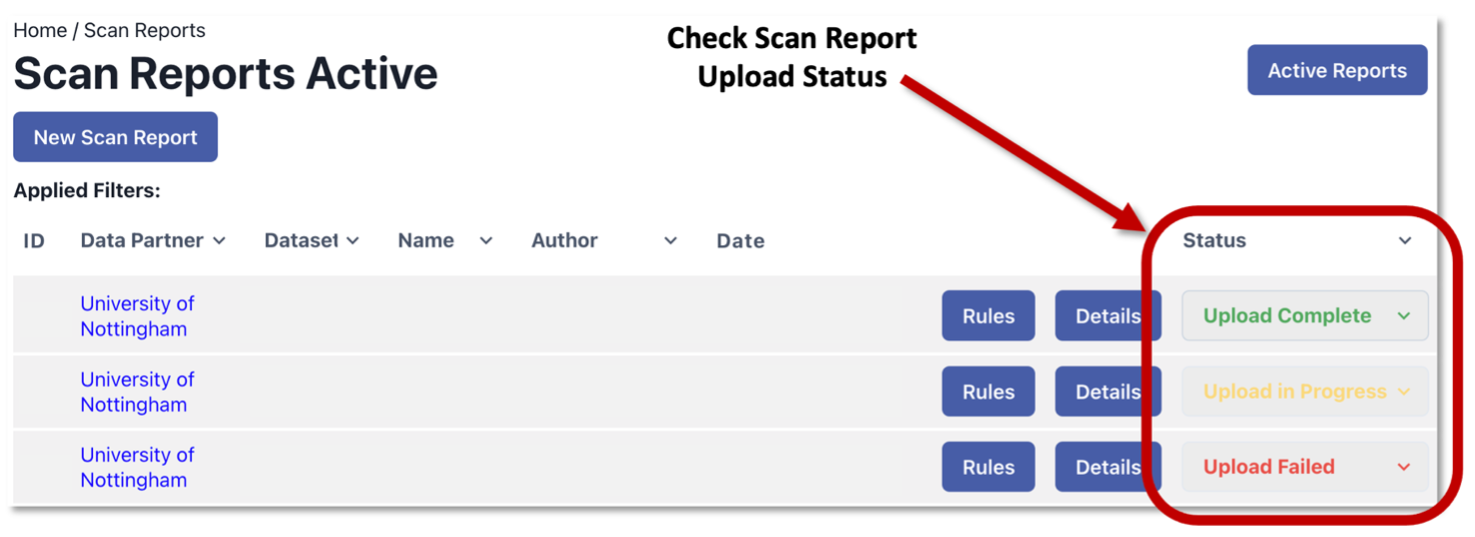
Figure 18: Example of Carrot Tool Scan Report Status Page
Map Rules
Choose Dataset
-
Log into Carrot:
-
Click Datasets Tab.
-
Click on the Dataset ID or Name.
-
Click on the Dataset ID, Data Partner or Name.
-
You will then be presented with a list of metadata tables.
-
Before you map rules, you must set the Person ID and Date Event for each table(see diagram below):
- Click ‘Edit Table’
- Select Person ID to map to for the Table.
- Select Date Event to map to for the Table.
- Click ‘Update’ Table-Name.csv.
-
Now the system is ready to map rules!
Enter Rules
-
Choose the required table & click.
-
You will then be shown the data attributes for that table.
-
There are two levels at which rules can be mapped to data attributes:
(a) For all values per data attribute:
- Enter the OMOP Concept ID in the box.
- Press ‘ADD’
- This will then map the OMOP Concept ID to all of the values for that individual data attribute.
(b) For individual values per data attribute:
- Click on the data variable to enter the set of values.
- Enter the OMOP Concept ID in the box for each individual value as needed.
- Press ‘ADD’
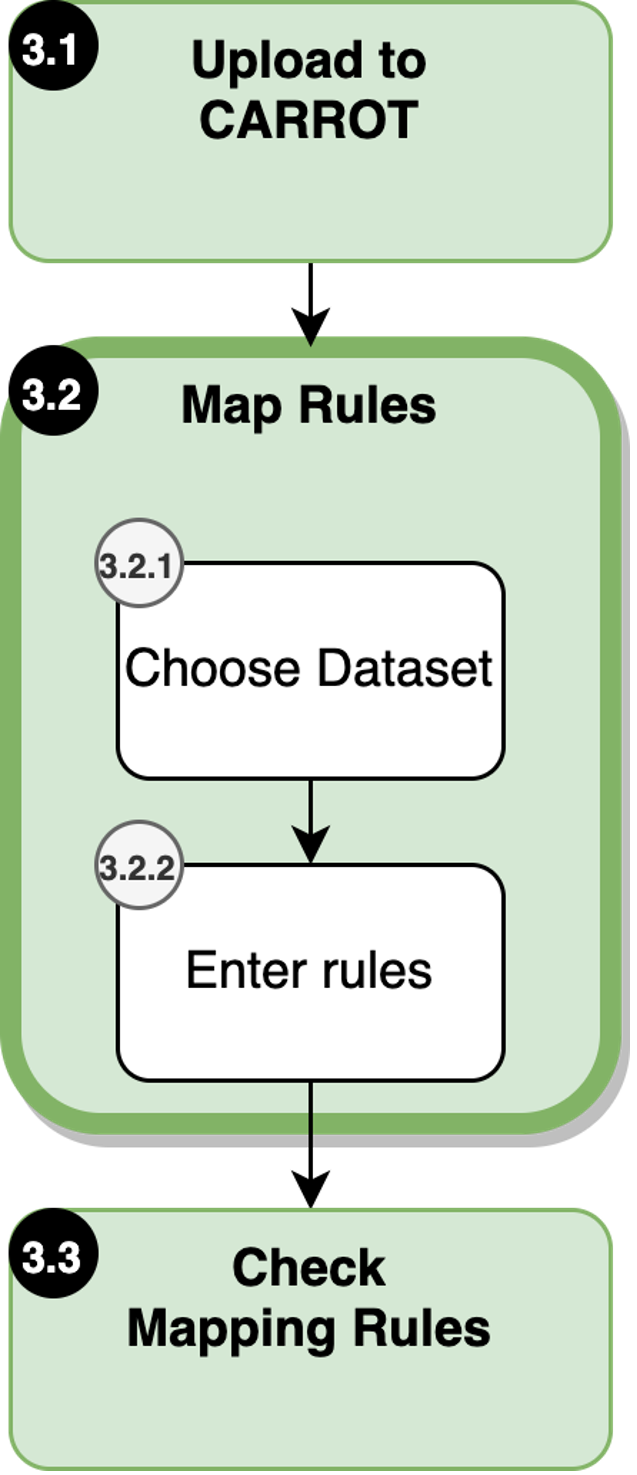
Figure 19: Upload Mapping Rules in Metadata Mapping.
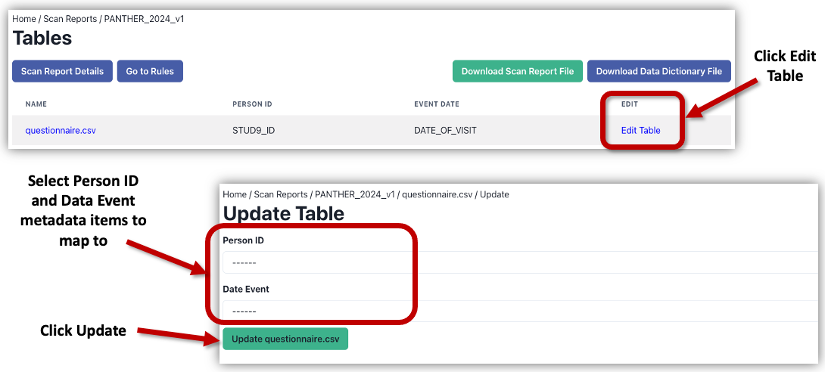
Figure 20: Setting Person ID and Date Event for Each Dataset Metadata Table.
Check Map Rules
Choose Dataset
- Log into Carrot:
- Click Datasets Tab.
- Click on the Dataset ID or Name.
- Click on the Dataset ID, Data Partner or Name.
- Click on ‘RULES’ button.
- There are the following options (see diagram below):
- Download Mapping JSON
- View Map Diagram
- Download Map Diagram
- Download Mapping CSV
- Show Summary View
- Analyse Rules
- Check your mapped ruleset using one of the above options.
Export Mapping Ruleset:
- Click ‘Download Mapping JSON’
- The JSON file will then be exported from CARROT and downloaded to your system.
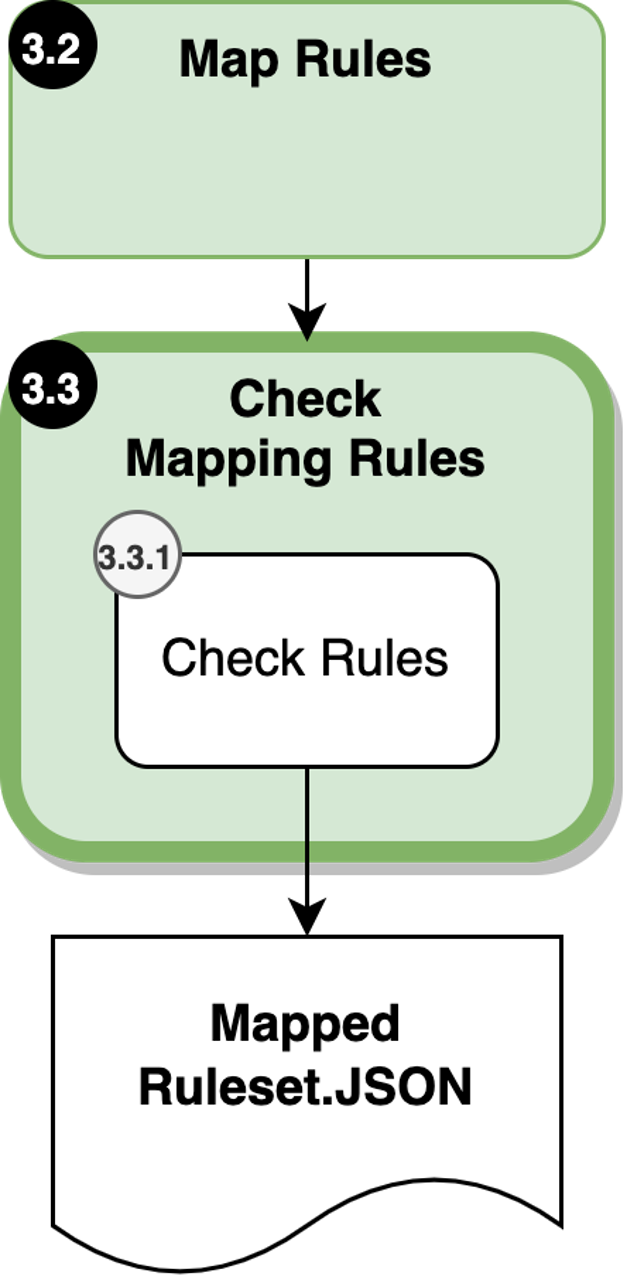
Figure 21: Check Mapping Rules in Metadata Mapping.
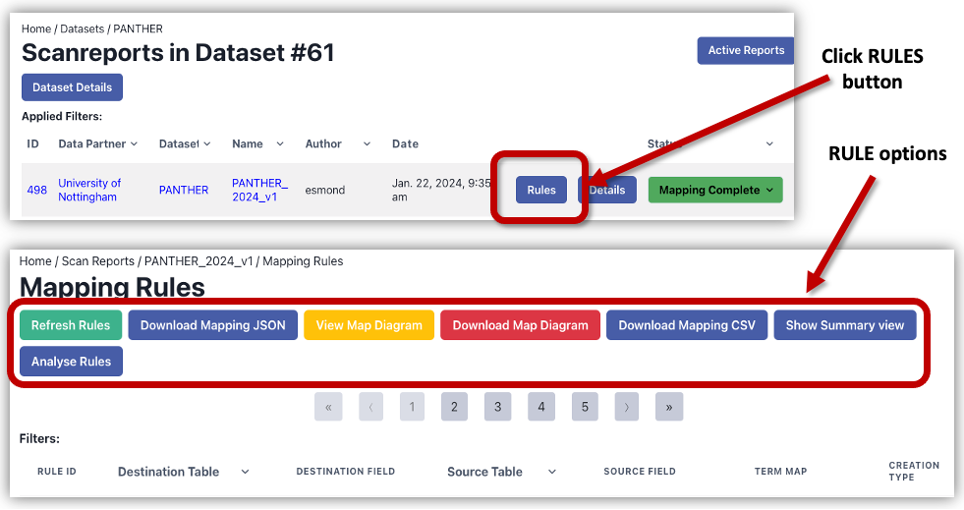
Figure 22: Example of Dataset Mapping Rule Options.