Phase 2: Data Transformation with Carrot Mapper
What is Carrot Mapper?
Carrot Mapper is a web app which allows the user to use the metadata (as output by WhiteRabbit) from a dataset to produce mapping rules to the OMOP standard, in the JSON format. These can be ingested by Carrot Transform to perform the mapping of the contents of the dataset to OMOP.
Carrot Mapper provides automated mapping from a selection of vocabularies, reuse of mapping rules across datasets, and manual mapping rule generation. It also provides a number of helpful features to support and encourage standardized mappings across datasets.
What Carrot Mapper does:
- Takes your scan report from WhiteRabbit
- Lets you map each field in your data to the standard OMOP format
- Creates rules for how to transform your data
- Generates a configuration file that Carrot Transform will use
Overview
The second phase of the Carrot ETL workflow focuses on using Carrot Mapper to create data mappings and transformation rules. This phase uses the insights gained from WhiteRabbit profiling and turns them into ETL configurations that can convert your source data into OMOP CDM format.
Carrot Mapper Setup
Admin Configuration Required: Carrot Mapper requires initial setup through the admin backend. This includes creating projects, configuring data sources, and setting up user permissions. Please contact your system administrator to ensure the Carrot Mapper environment is properly configured before proceeding with this tutorial.
- Navigate to your Carrot Mapper instance
- Log in with appropriate credentials
- Verify you have access to the configured project
Note: Carrot Mapper is accessed through a web interface. The project and data source configuration should already be set up by your administrator.
Prepare Files for Upload
- Ensure you have:
ScanReport.xlsxfrom WhiteRabbit- Required permissions and access
Data Dictionary (Optional): A data dictionary is not mandatory for the upload process. If you have a data dictionary that matches your scan report, you can upload it to provide additional context about your data fields. However, for this tutorial, we’ll proceed without a data dictionary to demonstrate the upload process.
It is important to note that when we use a data dictionary, it automatically adds OMOP Concepts to fields and values in your Scan Report based on vocabulary mappings you define, which speeds up the mapping process. Additionally, it improves your data by populating the “Value description” column with helpful contextual information—for example, indicating that “F” means “Female” and “M” means “Male”—making it easier to understand and verify your data values during manual mapping.

Figure: Carrot Mapper Scan Report Upload Interface
- In Carrot Mapper, locate the upload section
- Upload your
ScanReport.xlsxfile - (Optional) If you have a data dictionary that matches your scan report, you can upload it here. For this tutorial, we’ll skip the data dictionary upload.
- Verify the scan report is properly loaded
- Review any validation messages or warnings
If you do use a data dictionary: For detailed requirements on data formatting and CSV file structure, see the Data Standards page.
Begin Data Mapping
Once you’ve uploaded your scan report (and optionally a data dictionary), the system processes the files and makes them ready for mapping. Here’s what you do next:
- Go to the “Scan Reports” page in Carrot Mapper
- Find and click on your uploaded scan report
- This opens the scan report detail page
On the scan report detail page, you’ll see the CSV files from your data. For this tutorial, you should see:
patients.csv
Let’s start mapping:
- Click “Edit Table” on patients.csv - this opens the mapping interface

Figure: Edit Table Interface - Configuring Person ID and Date Event for patients.csv
- Set up the key fields - you’ll see dropdown menus for:
- Person ID: Pick the field with patient identifiers (like “PersonID”)
- Date Event: Pick the field with event dates (like “BIRTHDATE, DEATHDATE”)
- Click “Save” to confirm your choices
Concept Reuse Configuration
During this process, you will see a checkbox asking the following:
“Do you want to trigger the reuse of existing concepts?”
Choose “Yes” if you want to:
- Reuse concepts from other scan reports in the same dataset to trigger auto-mapping based on existing concepts.
- Speed up the mapping process for similar data
Note: Enabling concept reuse may make the auto-mapping process take longer to run, but it will provide more consistent mappings across your datasets.
Auto-Mapping Process
What the auto-mapping process does:
The auto-mapping process maps your source data fields and values to OMOP CDM concepts and fields. If you uploaded a data dictionary, it uses the vocabulary mappings you defined to automatically assign OMOP concepts to your fields and values. If you enabled concept reuse, it also looks for similar fields in other scan reports from the same dataset and applies the same OMOP concept mappings that were used before.
Let us assume we had a data dictionary in this example. We would have uploaded it together with the scan report as we did in the previous step Prepare Files for Upload.
We would have then configured the Person ID and Date Event fields and checked the Do you want to trigger the reuse of existing concepts? checkbox for both files.
This would have triggered the auto-mapping process, and we would have seen the spinning orange circles in the “Jobs Progress” column.
After its completion, we would have seen the rules generated in the rules tab. We would have then seen the mapping diagram and the mapping rules JSON V1, V2 and CSV files.
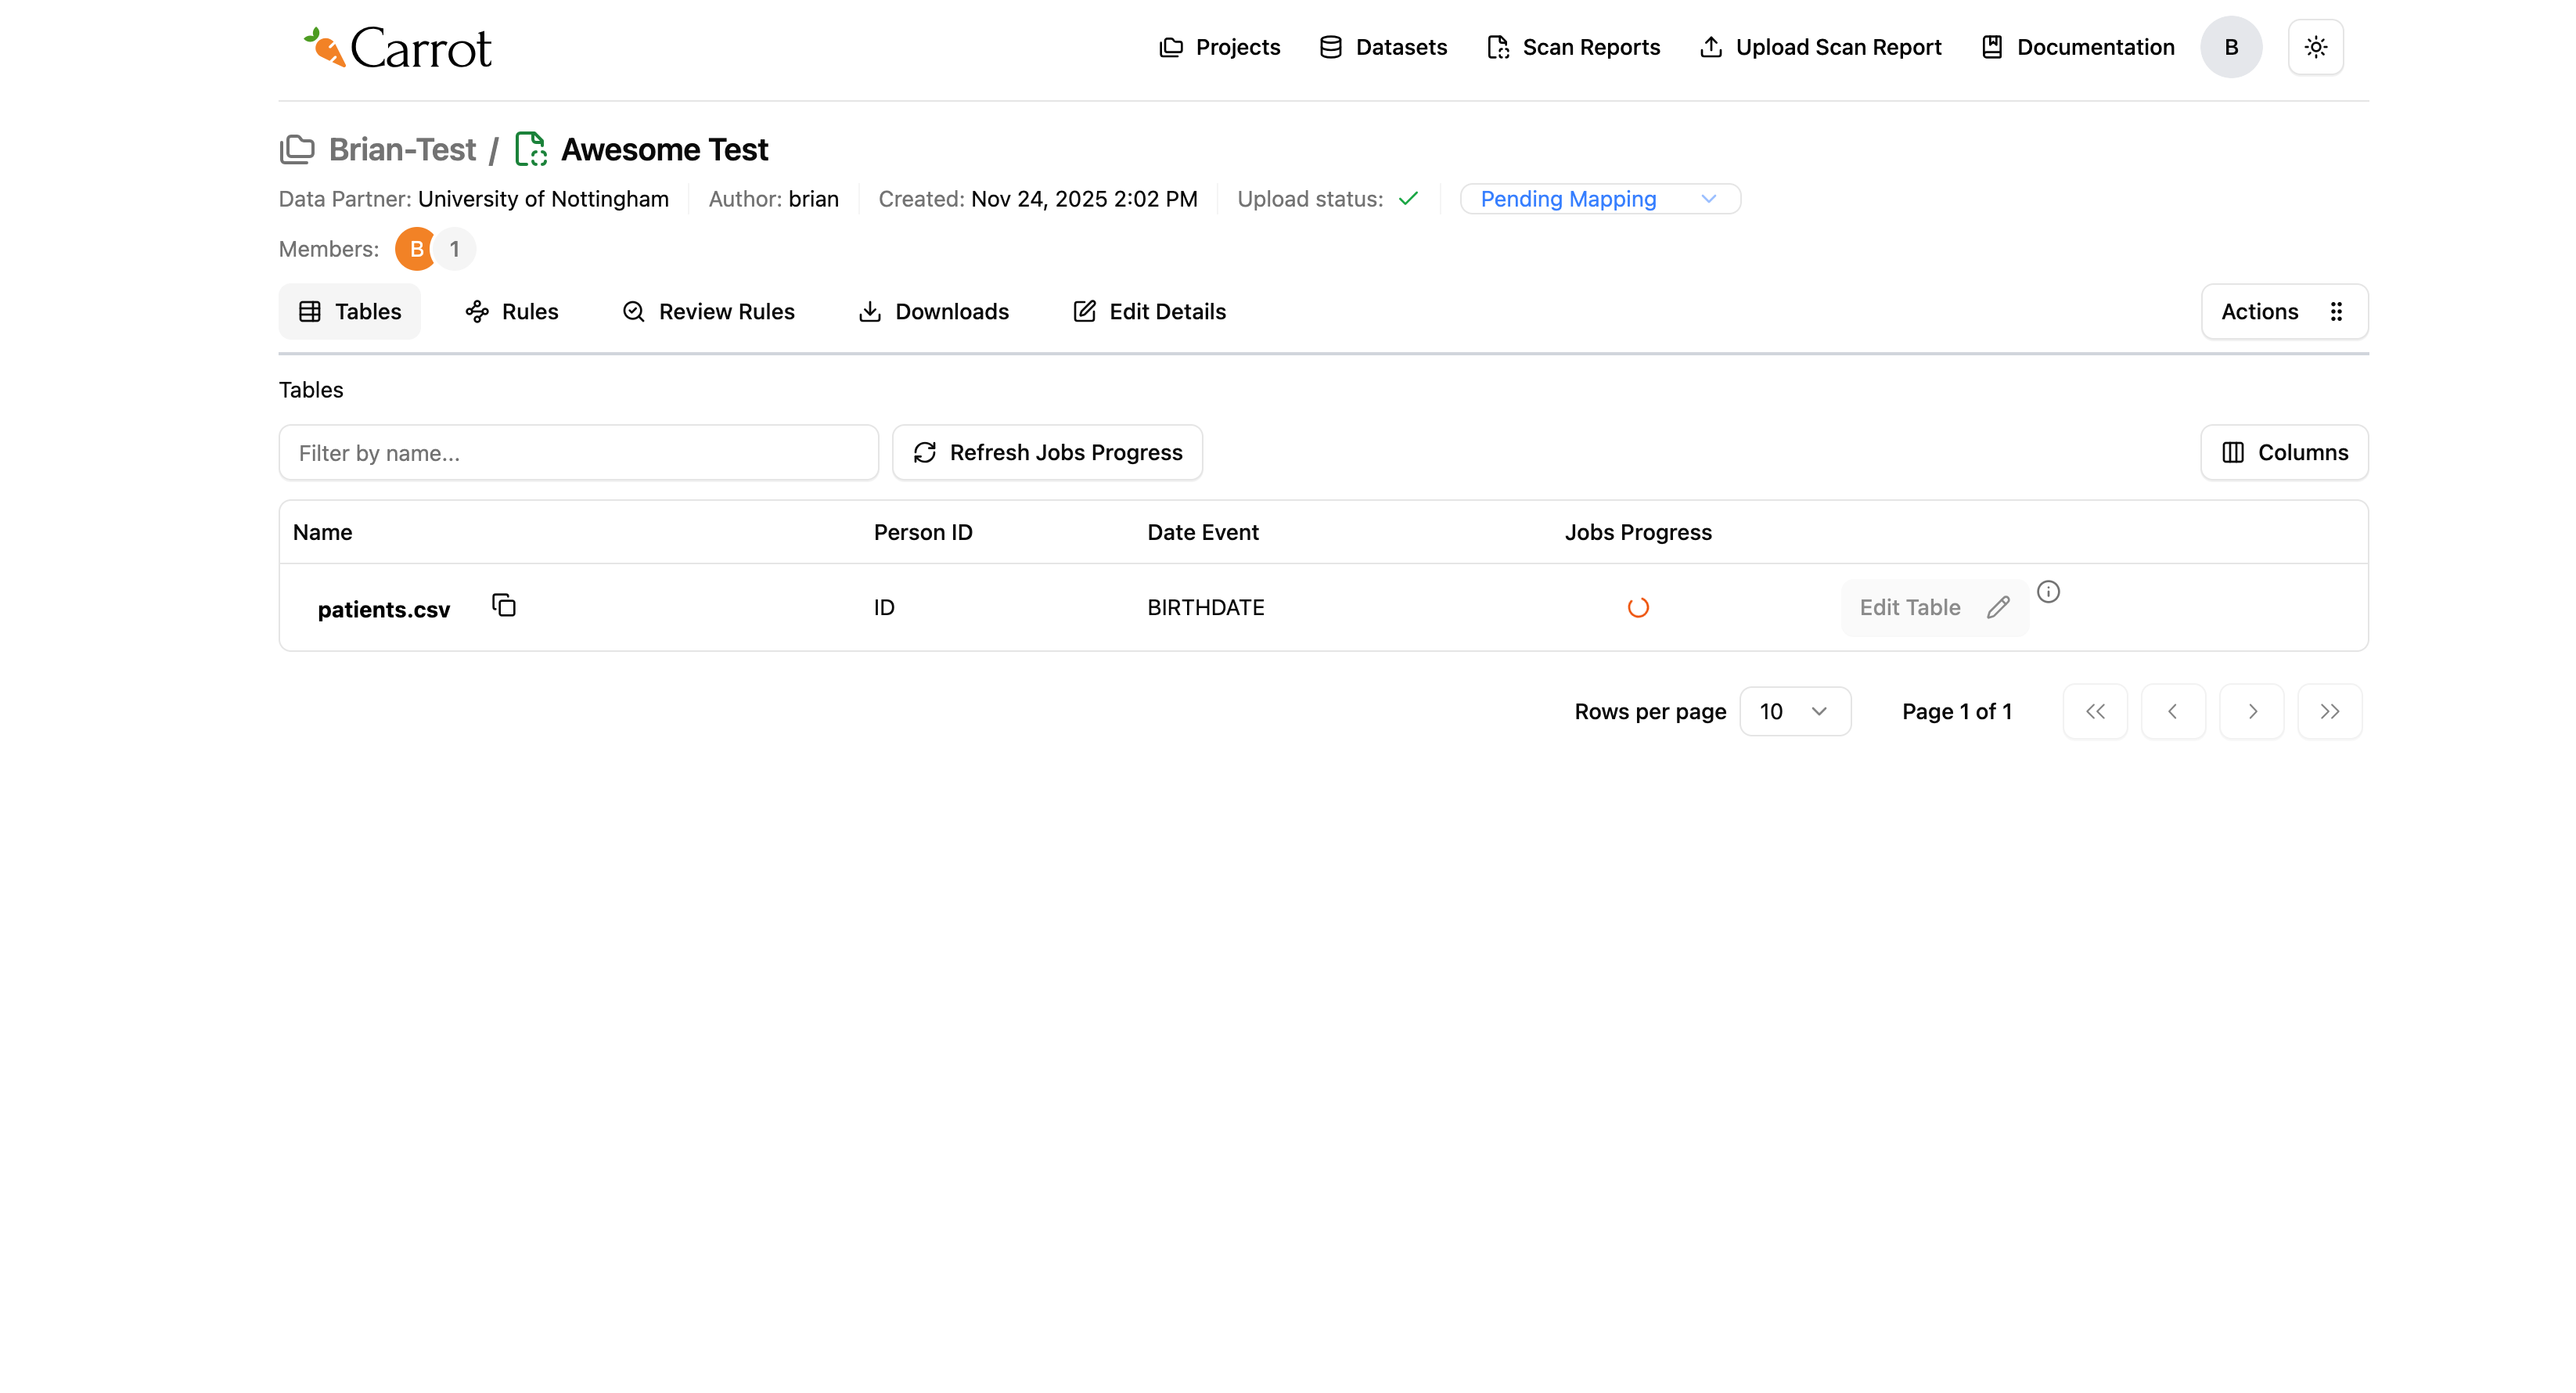
Figure: Auto-Mapping Process in Progress - Jobs Running
What you’ll see while it’s running:
- Spinning orange circles in the “Jobs Progress” column show it’s working
- The system looks through your data and creates initial mappings
- This might take a few minutes depending on how much data you have
- You can check progress using the “Refresh Jobs Progress” button
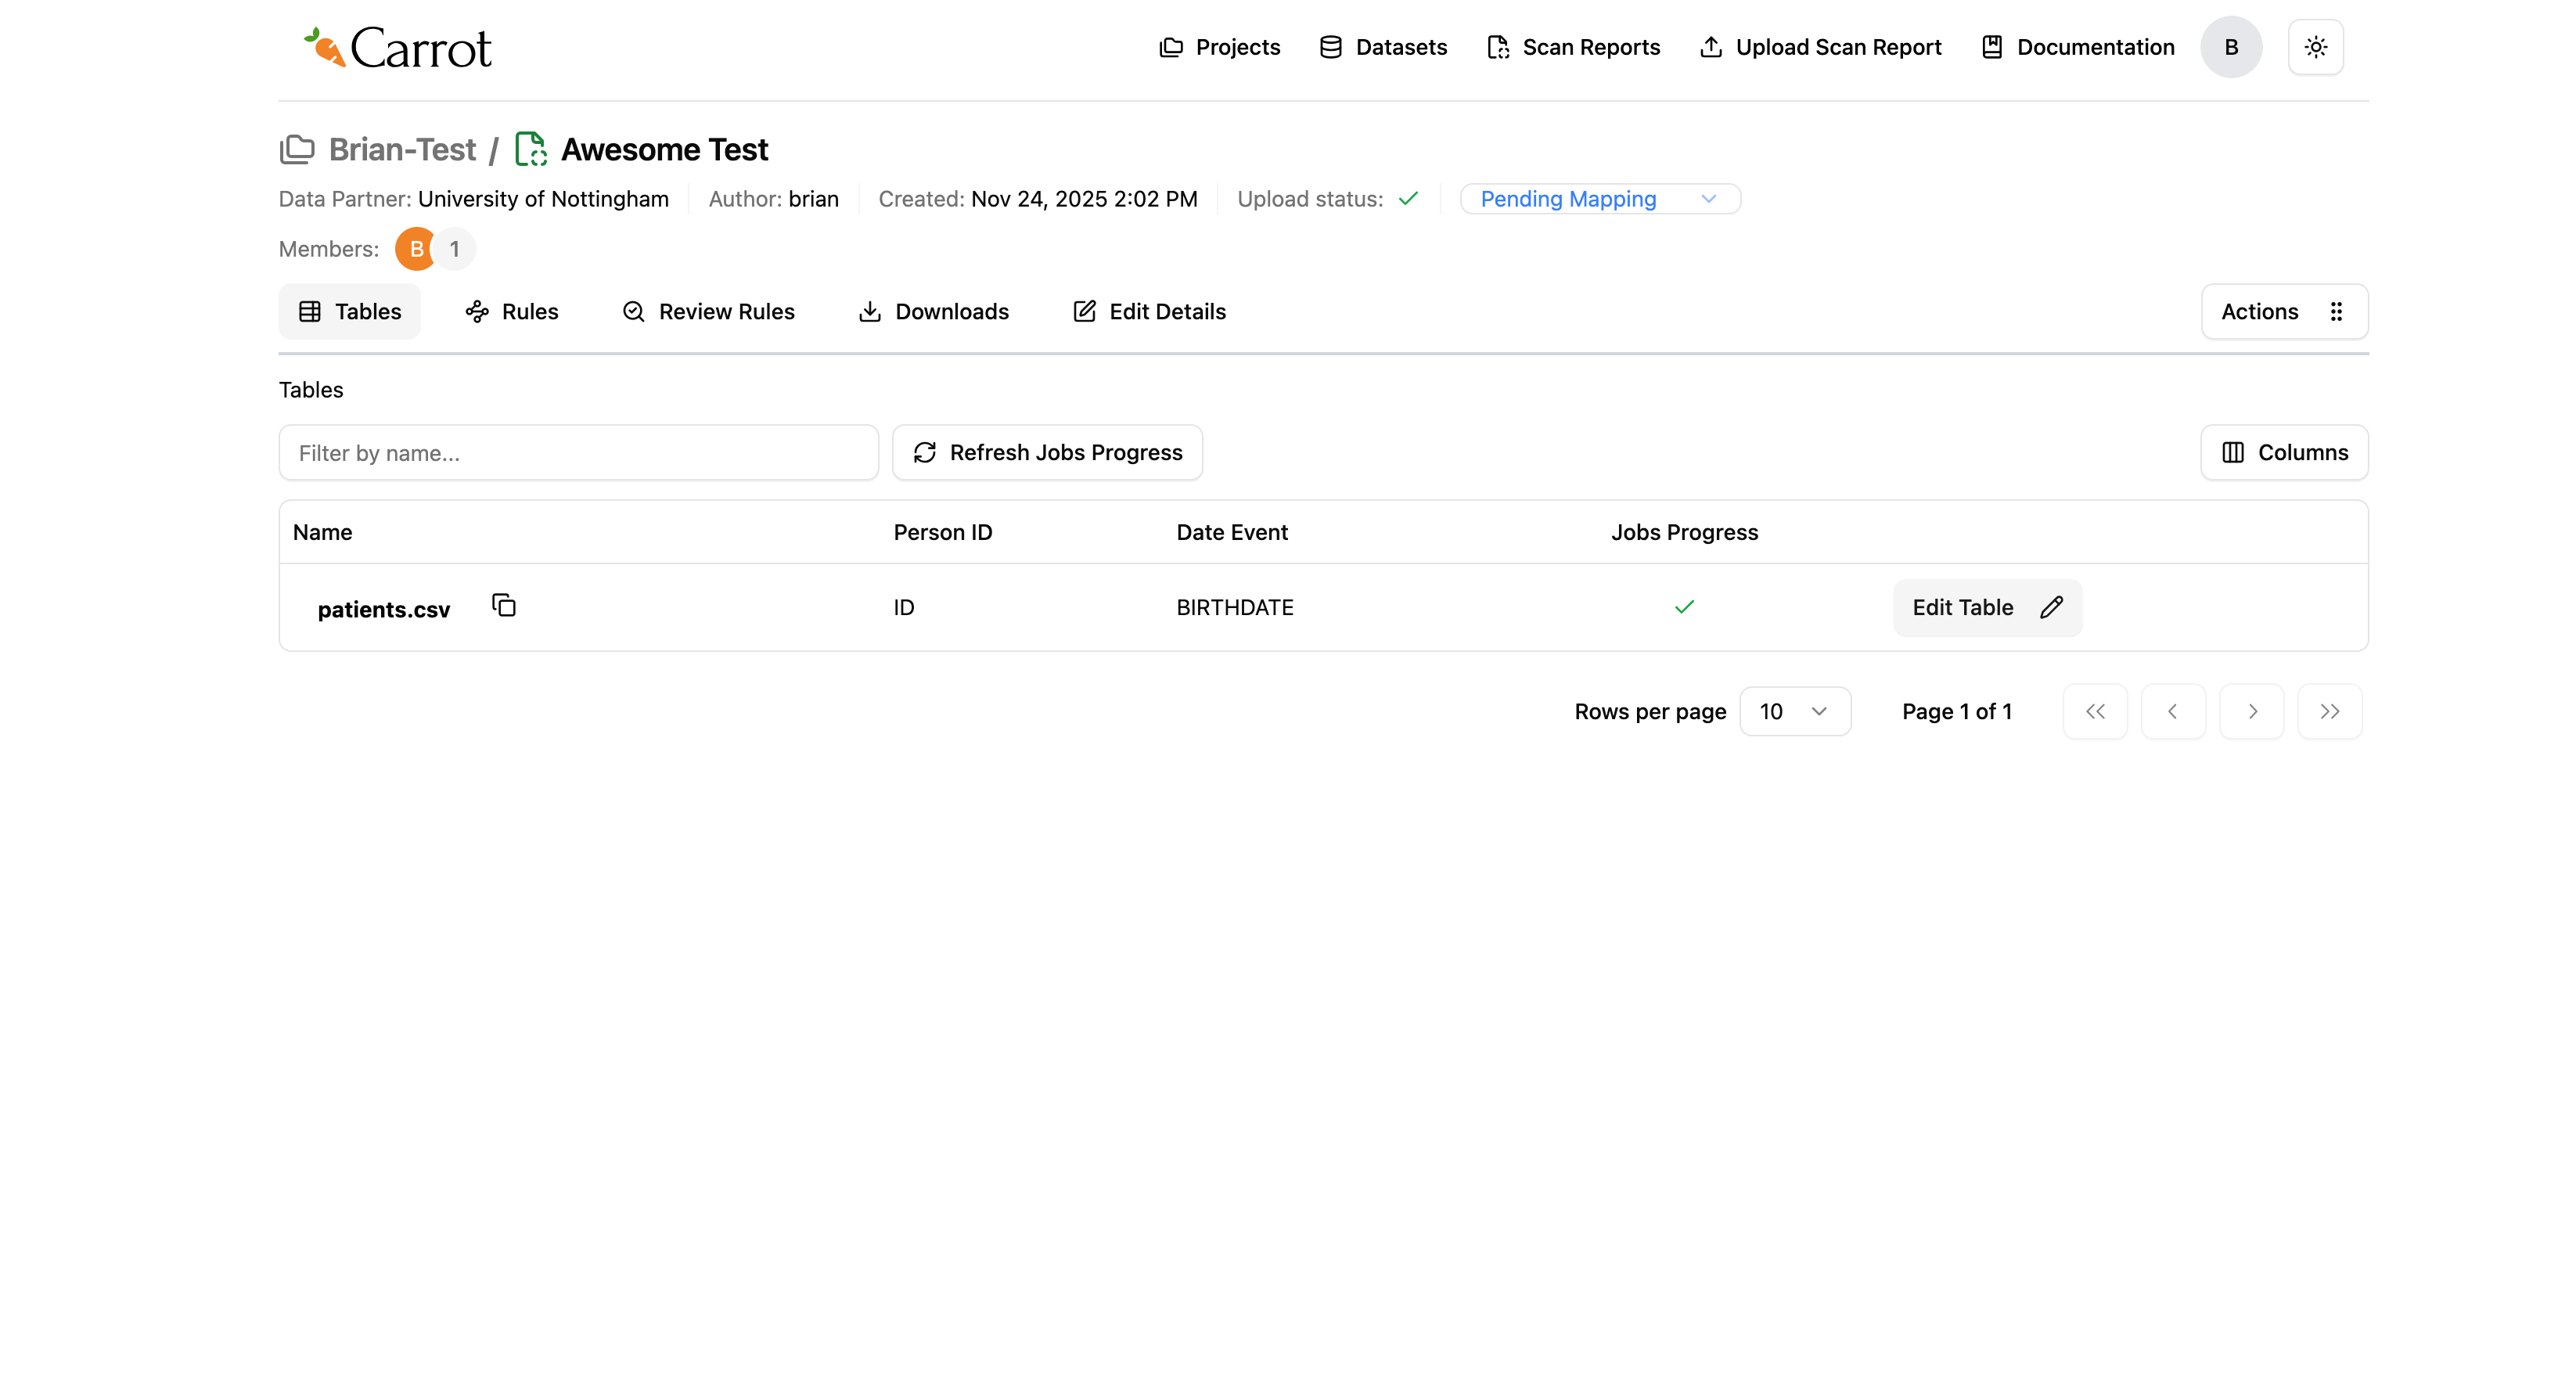
Figure: Auto-Mapping Process Complete - Ready for Review
When it’s done:
- The spinning circles disappear and get replaced with green checkmarks
- Your CSV files show as ready for review and editing
- You can click “Edit Table” to look at and adjust the mappings
- The system has created initial field mappings based on your Person ID and Date Event choices. Please note this is dependent on existence of similar scan reports in the same dataset.
Using AI Suggestions to Map Fields
When turned on, Carrot Mapper can provide AI-powered suggestions based on Athena to help you quickly map your data values to OMOP concepts. Below is how we can achieve it:
We first navigate into a field that we need to do the mapping, in this case we shall use the Gender as an example. When we navigate inside data, we shall find two rows, F and M.
F means “Female” and M means “Male”. At this stage, we shall navigate to the column that says AI Suggestions and click on the Suggestion button. Let’s begin with M row.
After clicking the suggestions button, we get a drop-down list with domains for us to select from as seen below.
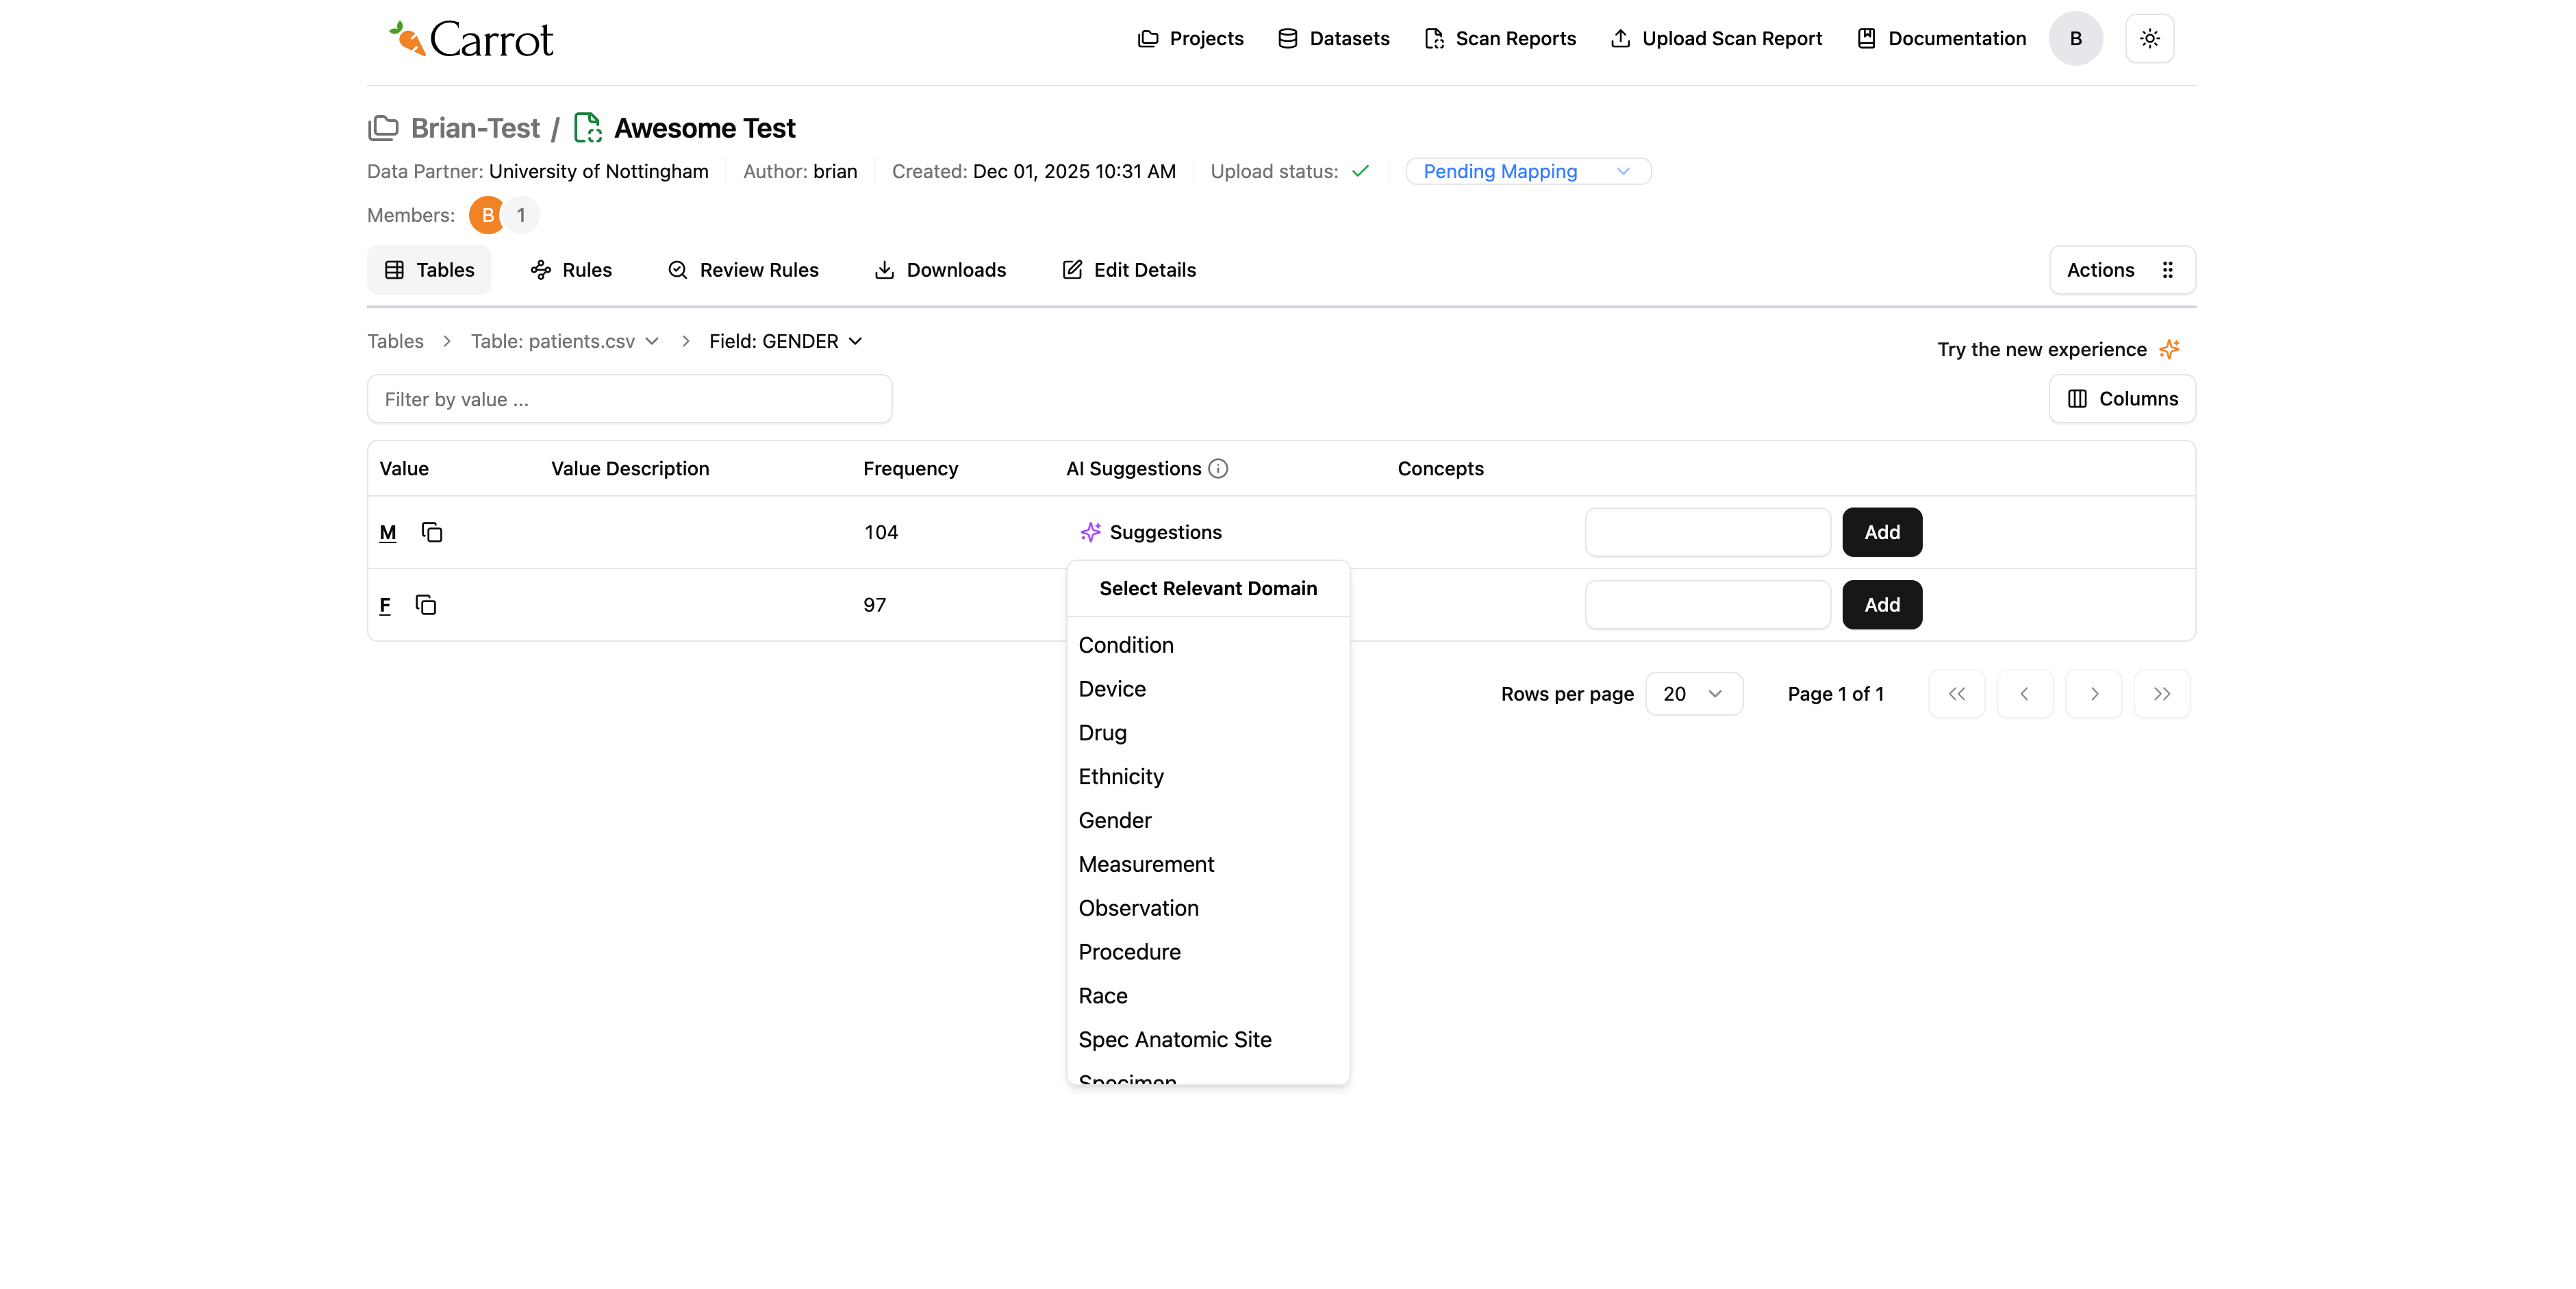
Figure: Selecting a domain for mapping
Since we are mapping gender, we shall select the gender domain for this mapping.
Once we click that, a modal will pop up with suggestions on the best OMOP concept to select from the AI suggestions.
From the modal, we see that we have an accuracy score which guides us on the best OMOP concept to select from the modal. Before selecting the concept, please verify if the concept name matches what we expect. In this case our concept name must be male.
We then click add and mapper will apply the OMOP concept we selected. After selecting, we shall see a green toast message confirming the successful addition of OMOP Concept successfully added.
A blue concept tag appears on the table row under the concept column showing the mapped OMOP concept. In case we wanted to change the OMOP concept, the blue concept tag has an X button that
we can use to remove the concept, and we can now be able to add another one.
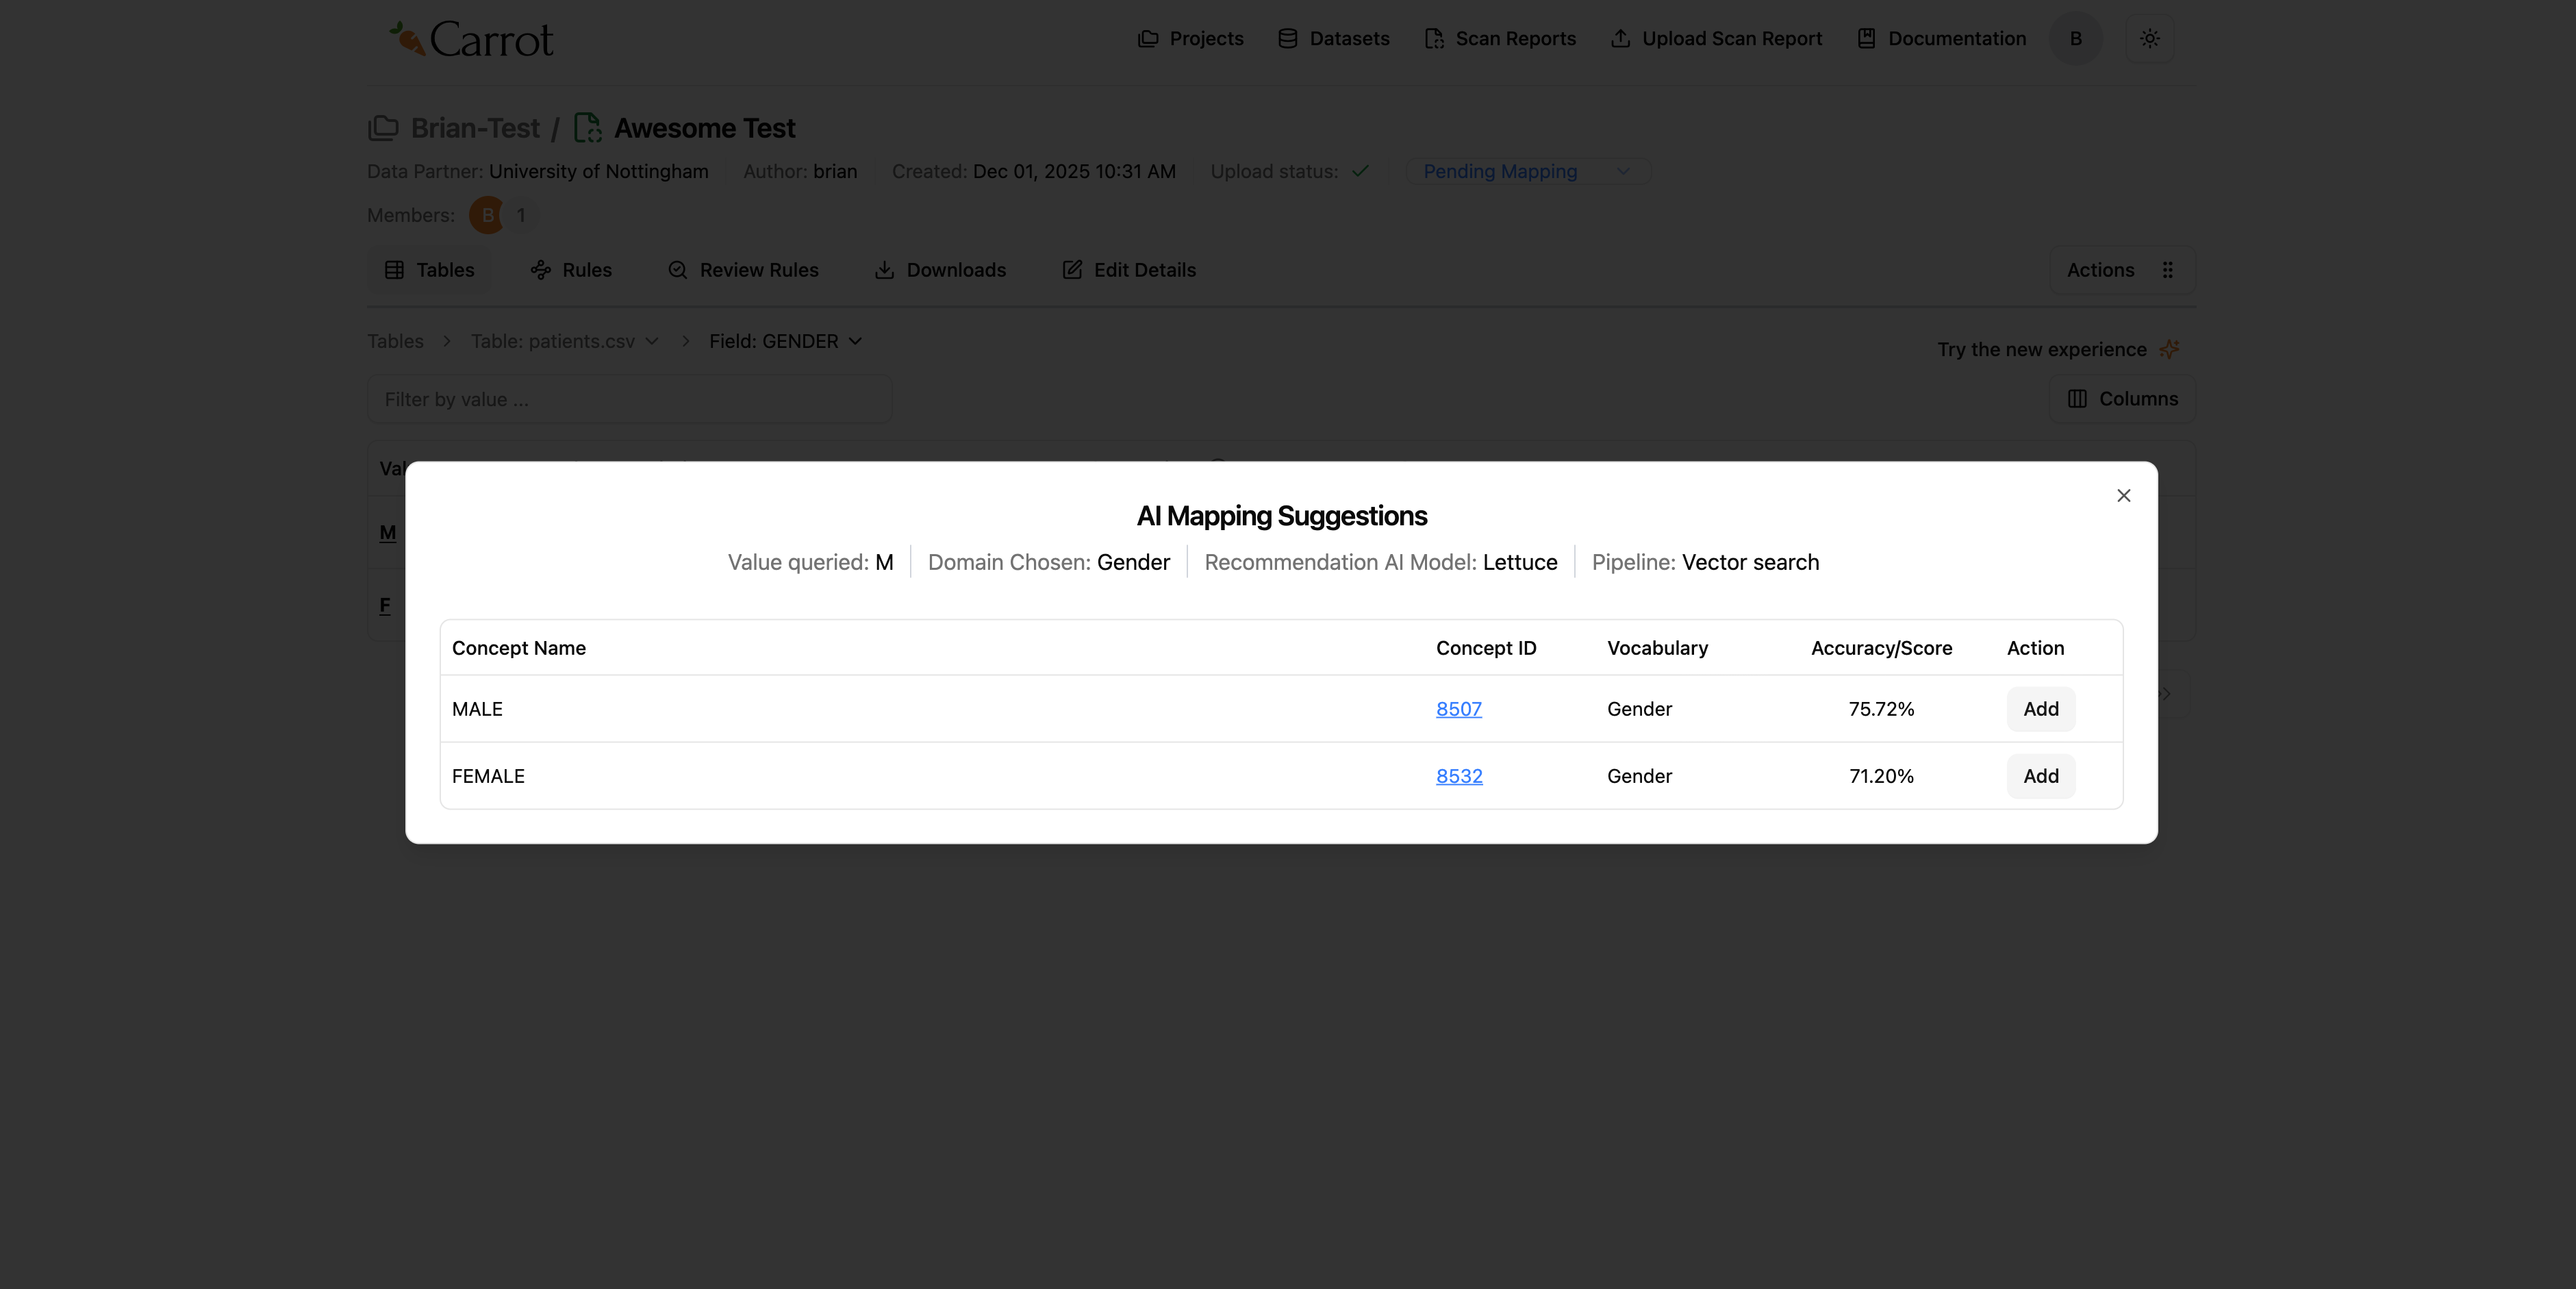
Figure: Adding the most accurate concept from AI suggestions
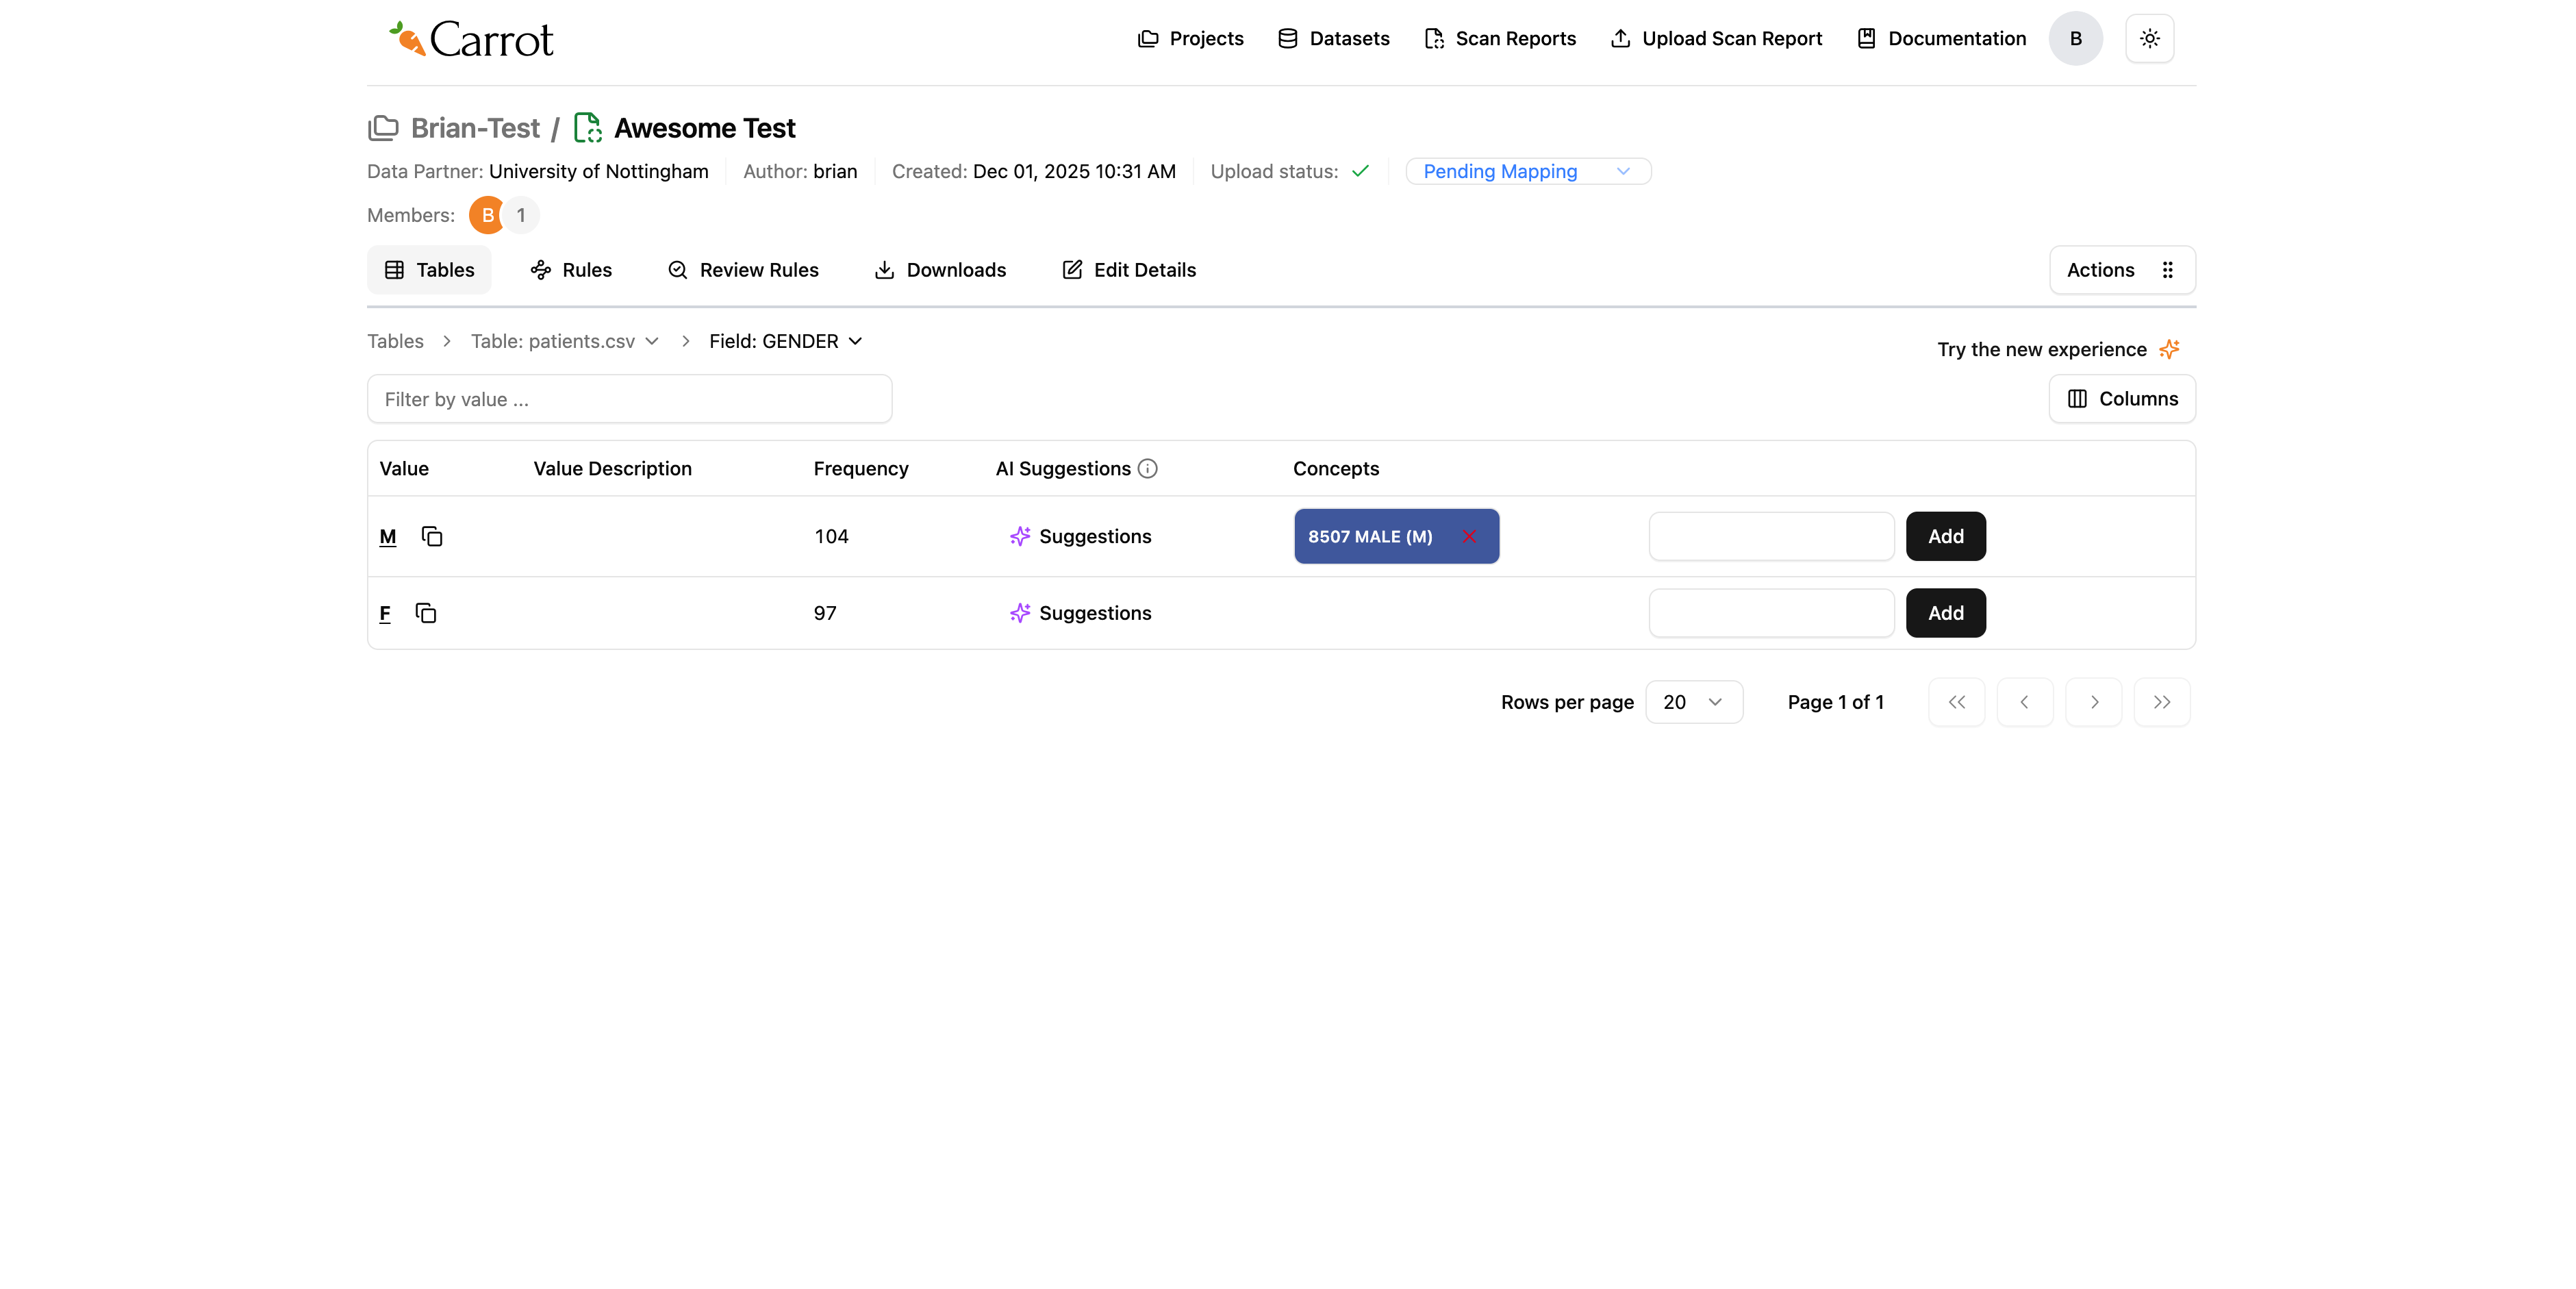
Figure: View mapped value from AI suggestions
Manually Mapping Data Values
We may also do mapping manually by adding OMOP concepts by typing the concepts value in the input field to the left of the add button.
For this example we shall map Female. The OMOP concept code is 8532. Please see below on how to map it using the input field.
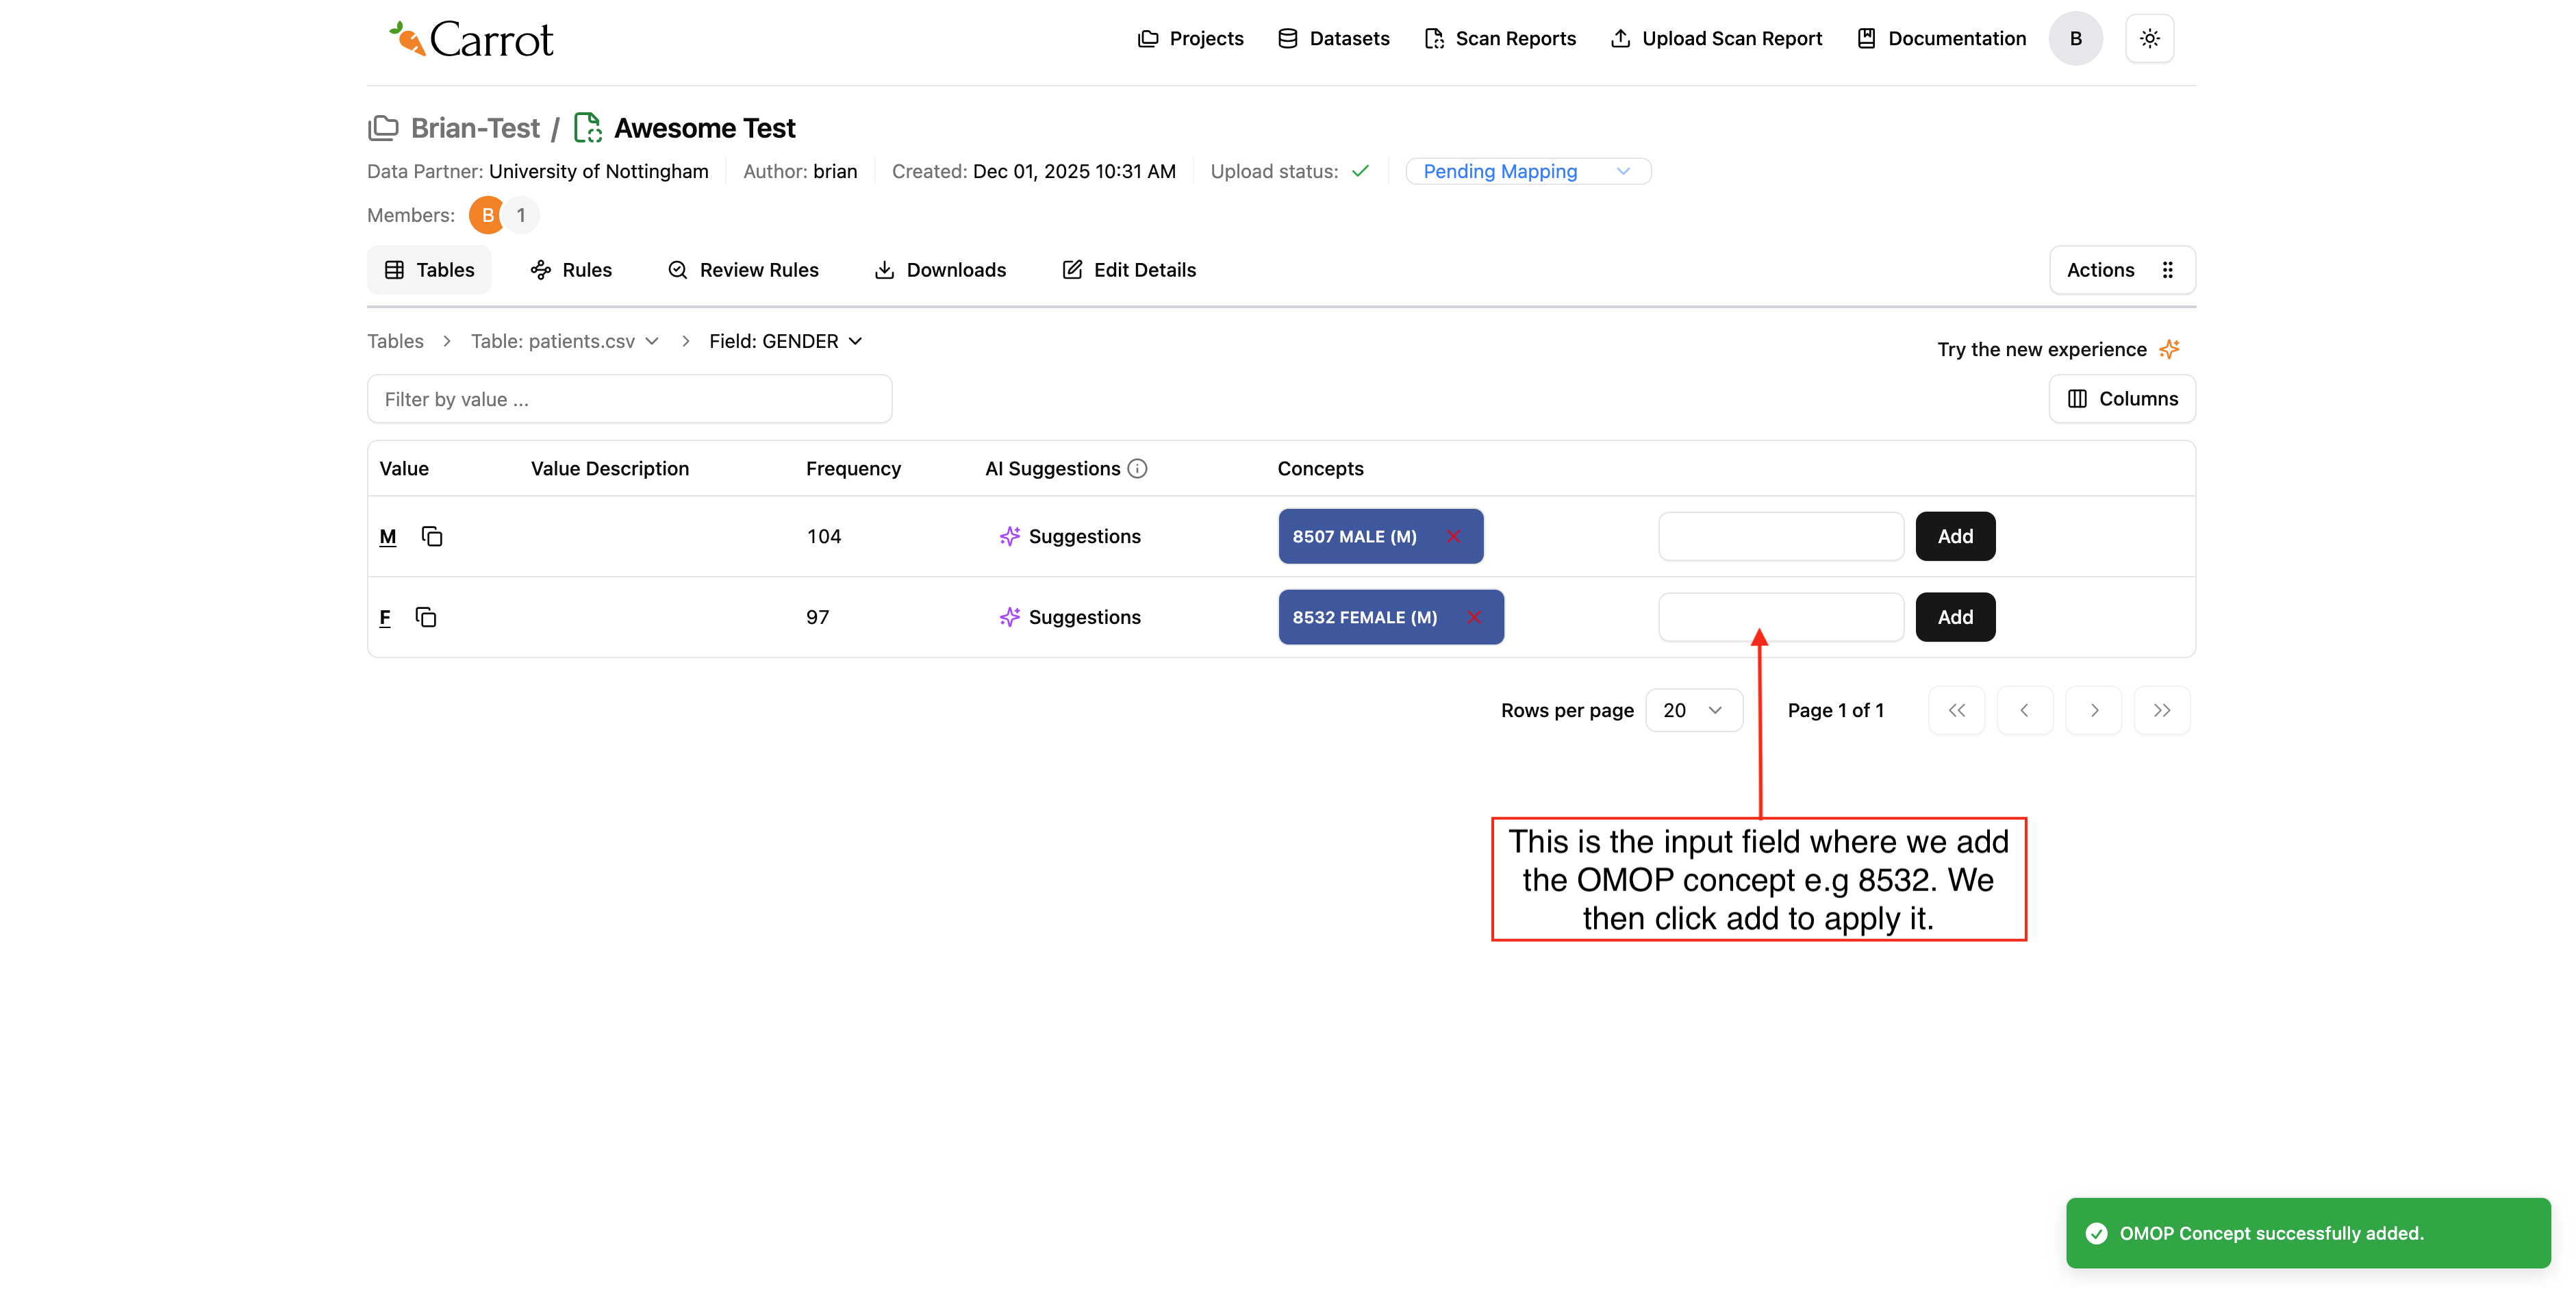
Figure: Adding concept manually on the input area
Review Generated Rules and Mapping Diagram
Once the auto-mapping is done, you can check out the rules it created and see how your mappings look.
- Click the “Rules” tab in your scan report
- Check out the generated rules - you’ll see all the transformation rules that were automatically created
- Look at the details - each rule shows how your source data fields are mapped to OMOP CDM fields
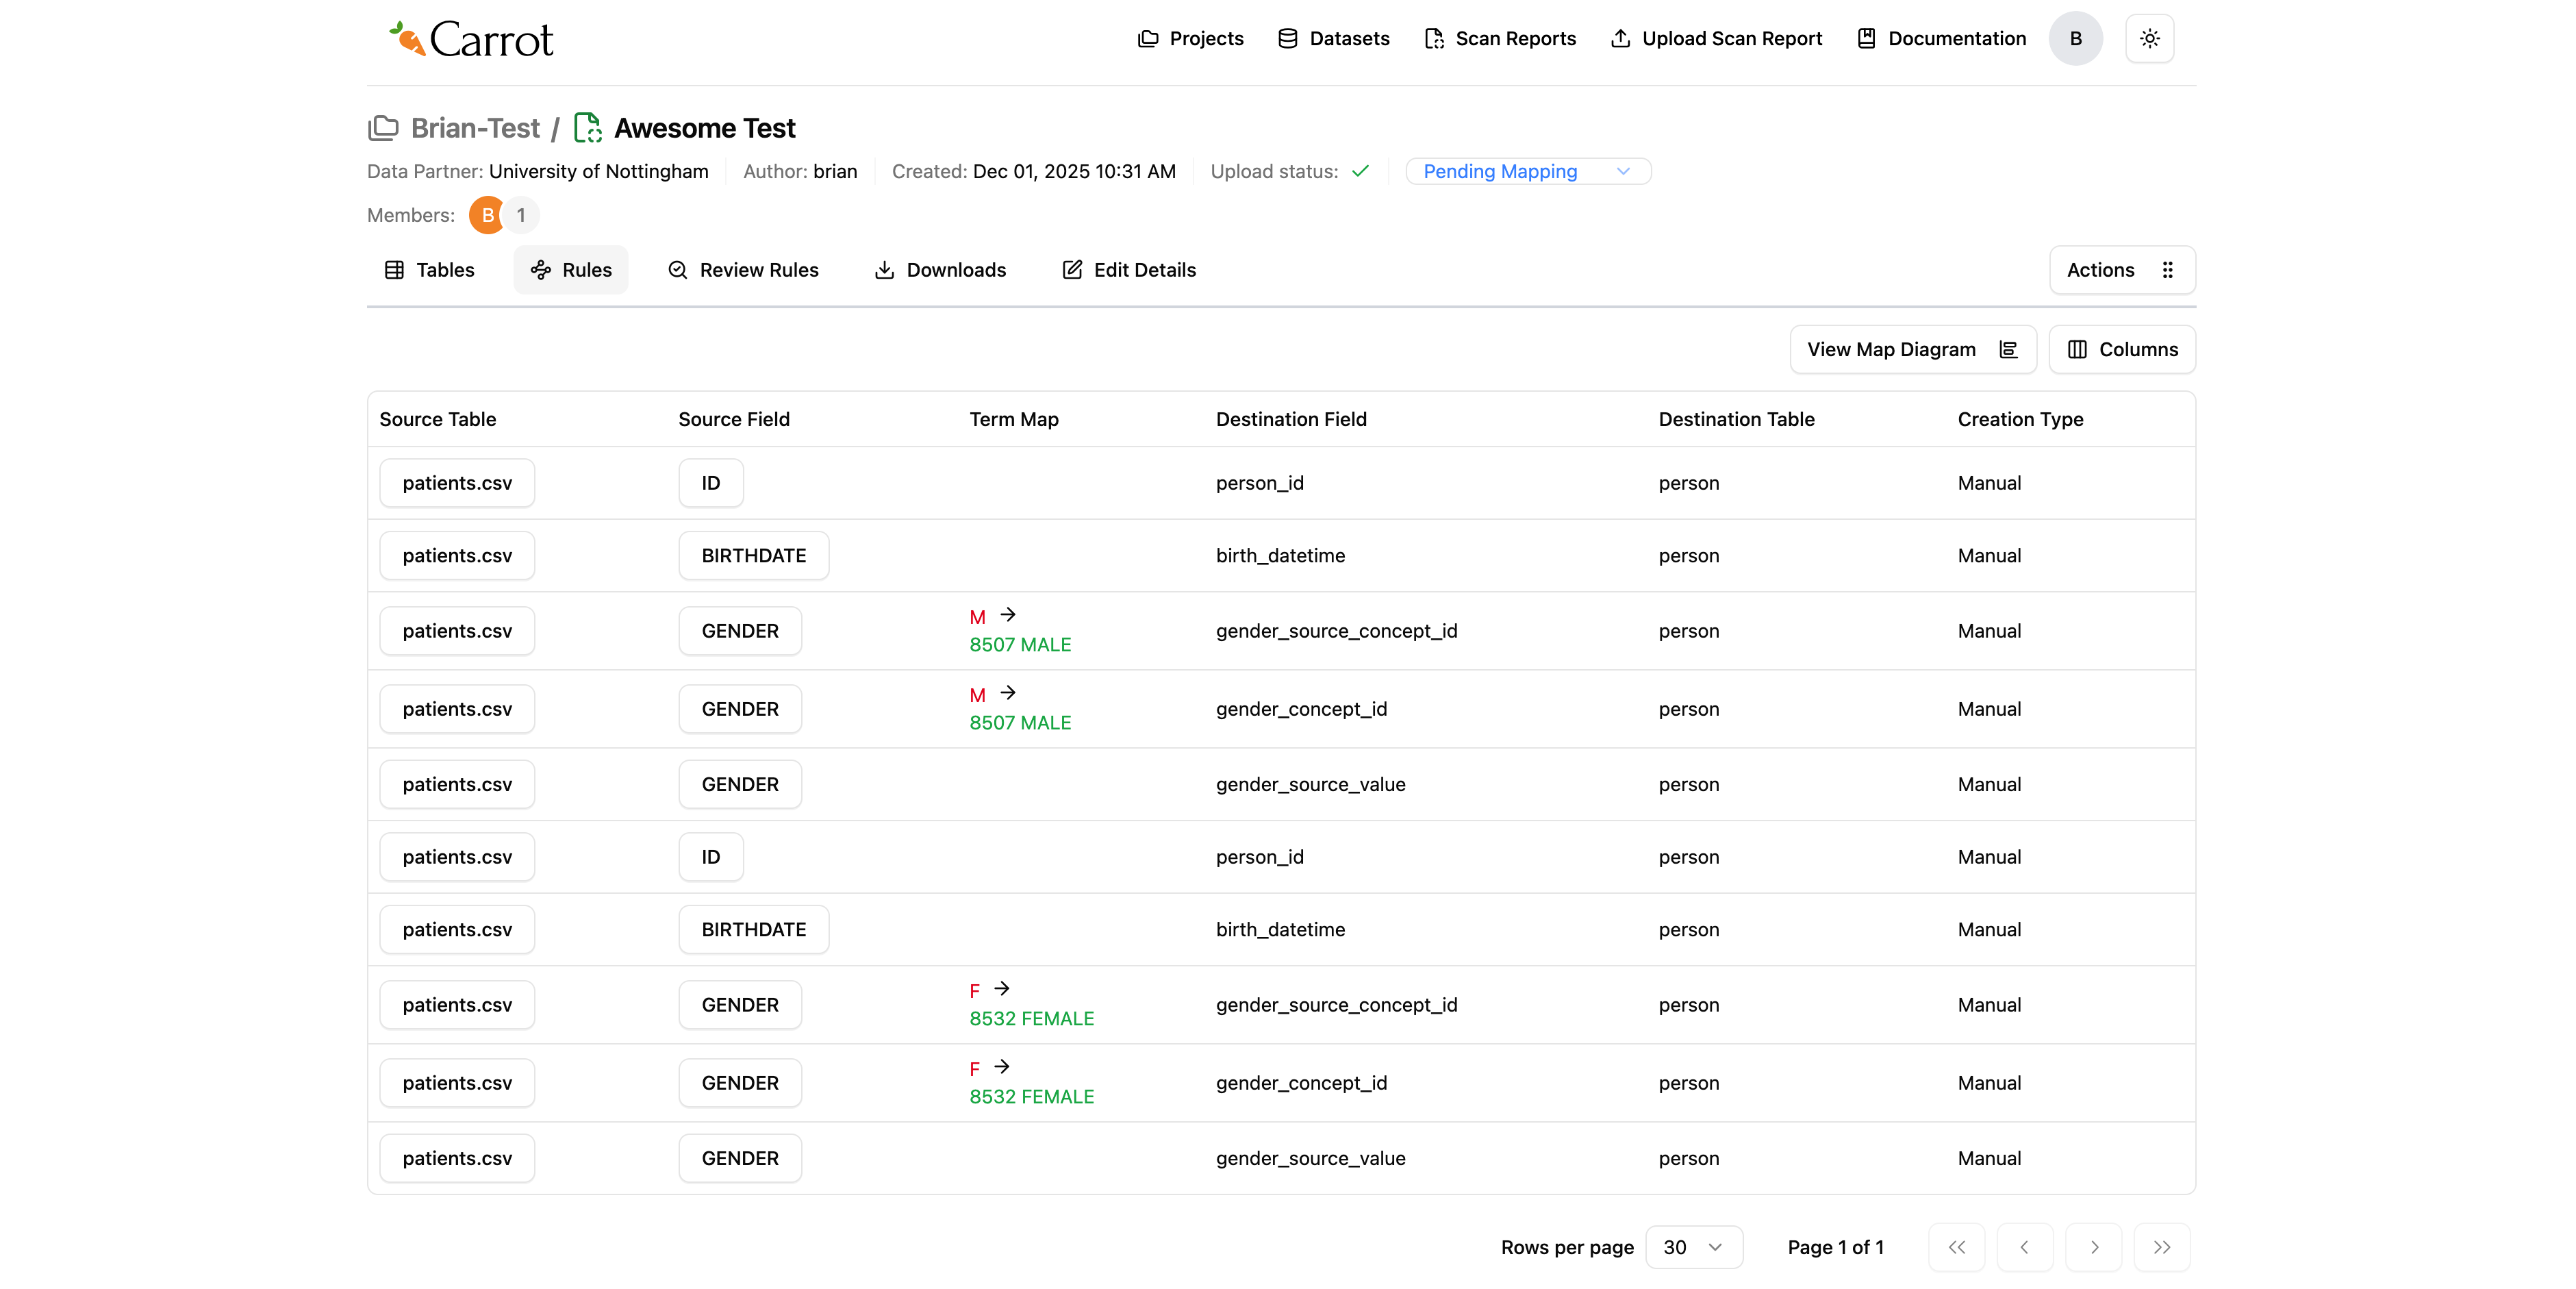
Figure: Generated Rules View - Field Mappings and OMOP CDM Transformations
Now below let’s see how to view our mapping diagram which is based on the rules generated
- Click “View Map Diagram” - it’s at the top left of the Rules tab
- See your mappings visually - this shows a diagram of how your source data connects to the OMOP CDM structure
- Understand the relationships - the diagram helps you see the overall data flow and how fields connect
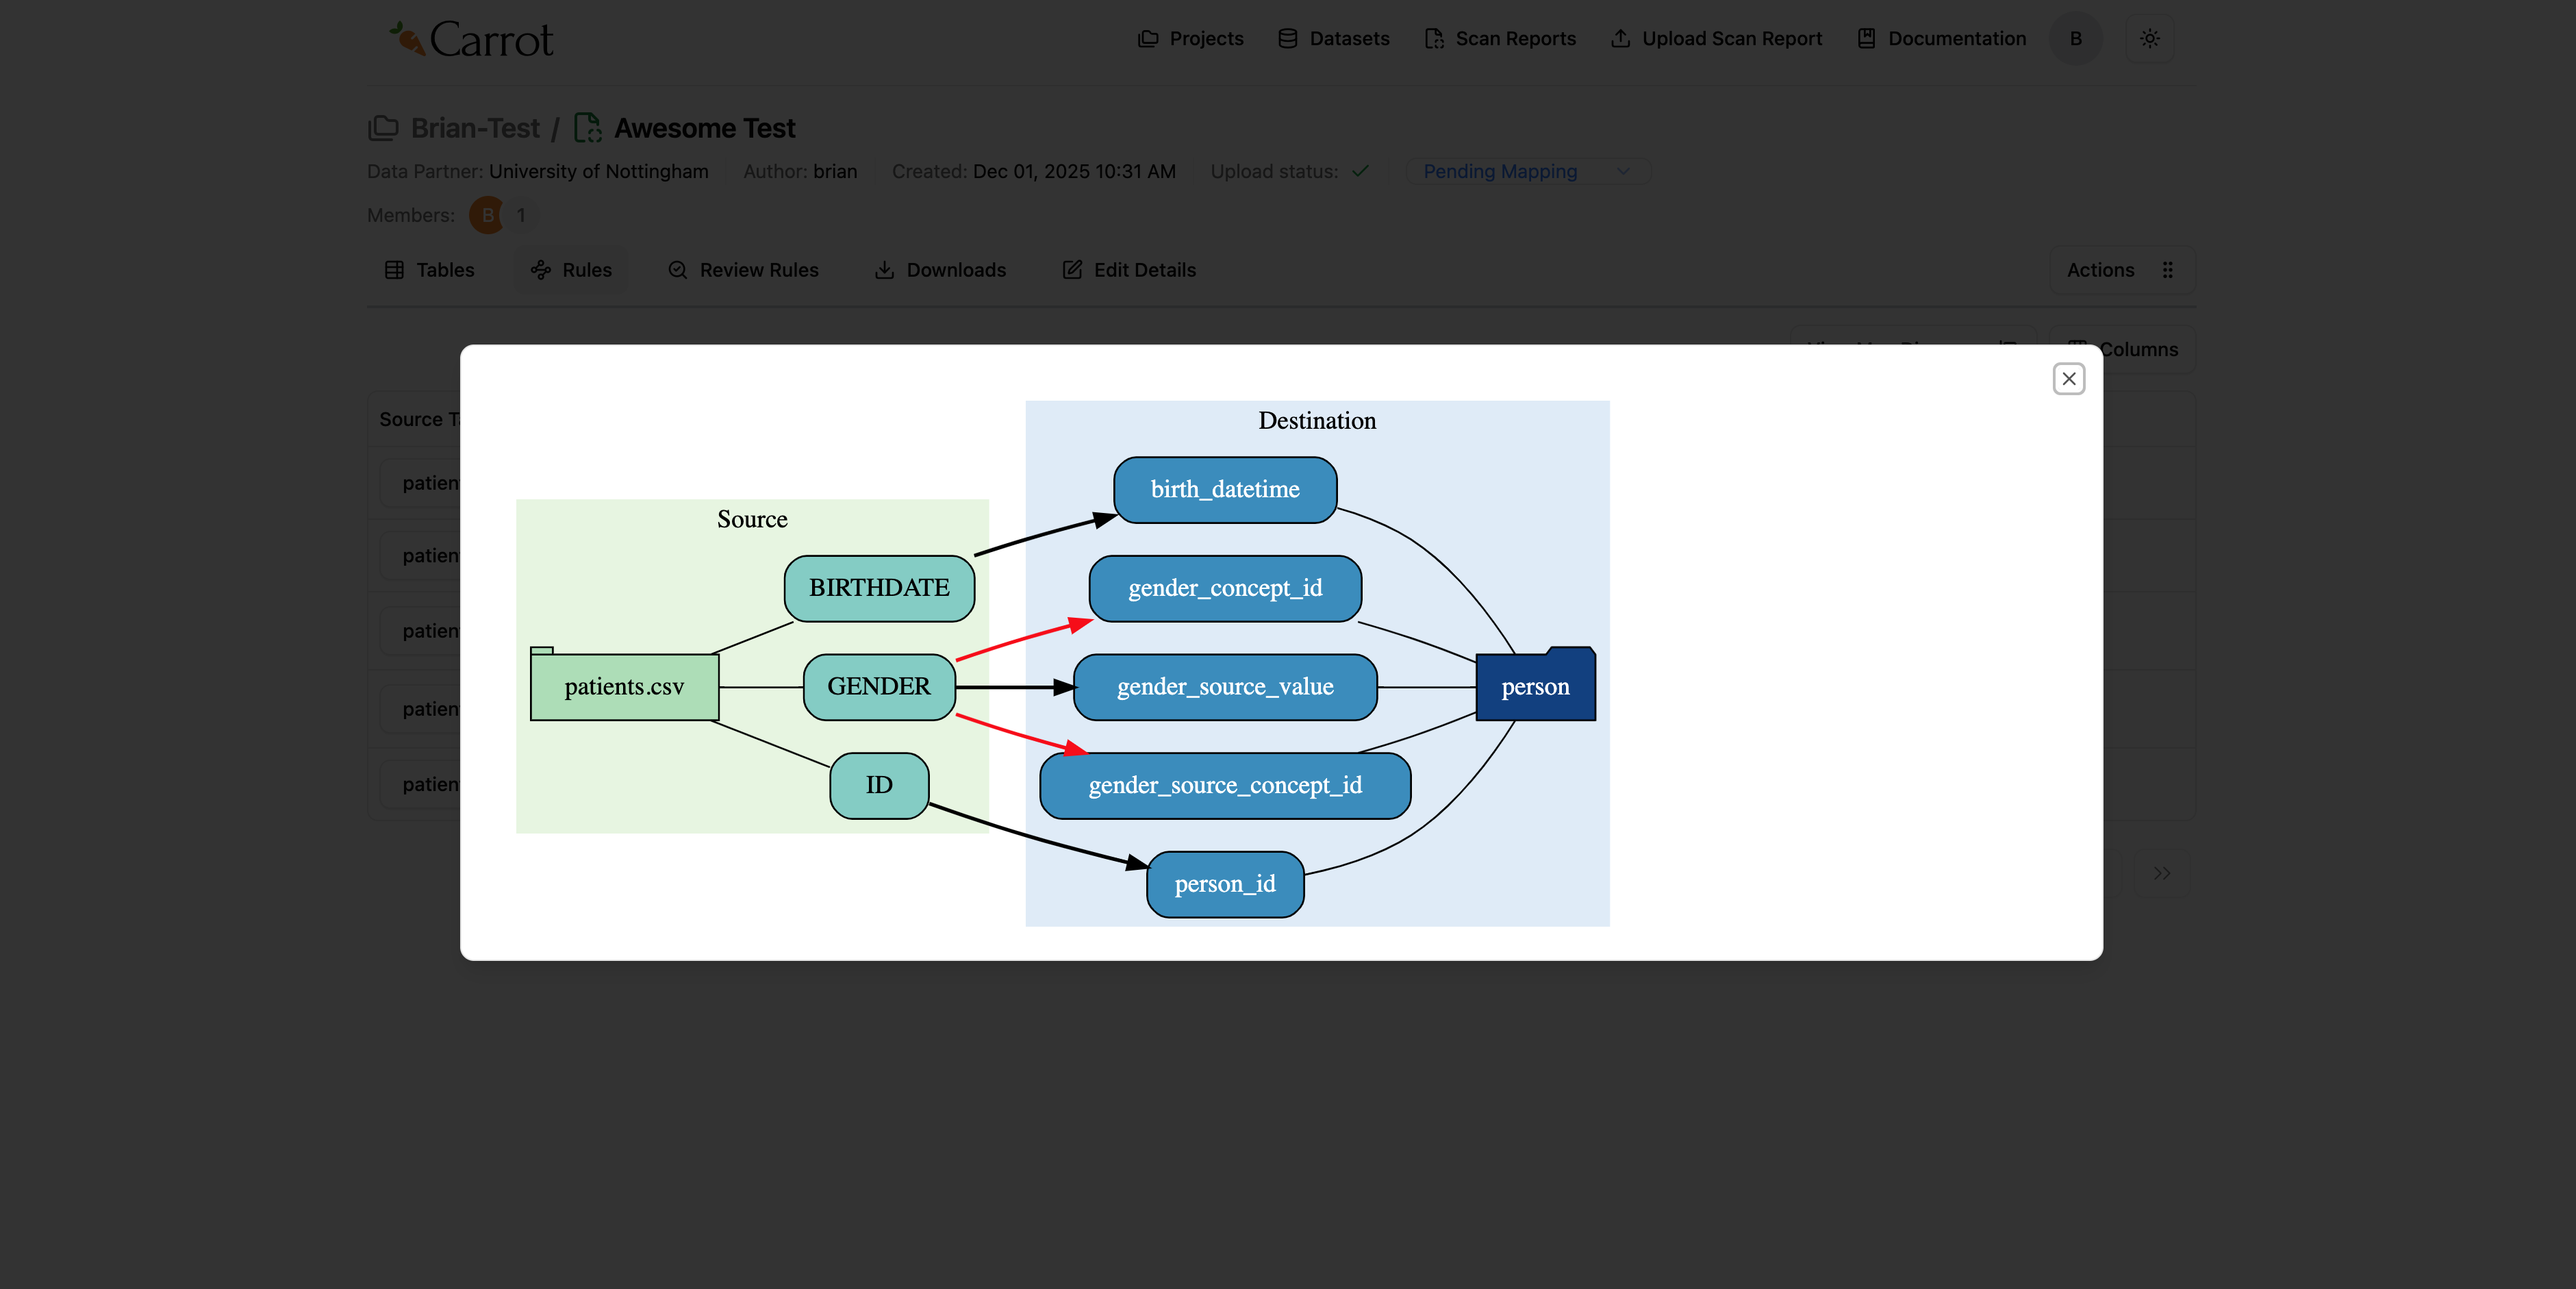
Figure: Mapping Diagram - Visual Representation of Data Flow and Field Relationships
Tip: The mapping diagram is really helpful for understanding complex data relationships and making sure your mappings work with OMOP CDM requirements.
Download Mapping Configuration
Once you’ve checked out your rules and mapping diagram, you can download your mapping configuration to use with Carrot Transform.
- Click the “Actions” button - it’s in the top right of the Rules tab
- See what’s available - this opens a dropdown menu with download and management options
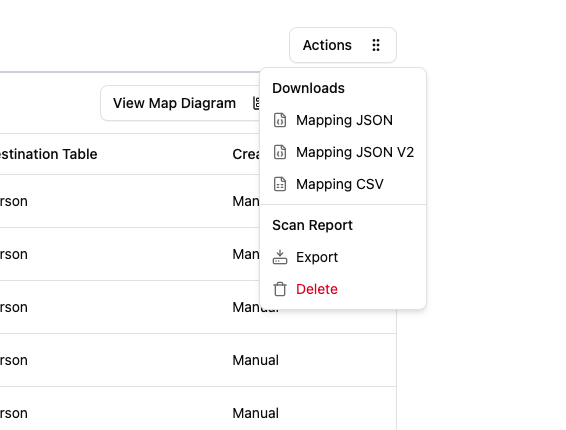
Figure: Actions Menu - Download Options and Scan Report Management
Downloads Section:
- Mapping JSON: Downloads your mapping configuration in JSON format (this is what Carrot Transform needs)
- Mapping JSON V2: Downloads your mapping configuration in JSON V2 format (enhanced version)
- Mapping CSV: Downloads your mapping configuration in CSV format
Scan Report Section:
- Export: Exports the scan report data
- Delete: Deletes the scan report
For Mapping JSON and Mapping CSV:
- Click “Mapping JSON” or “Mapping CSV” - pick your preferred format
- The system starts preparing your file - it gets your mapping configuration ready
- You’ll be taken to the Downloads tab - this happens automatically
- Watch the progress - keep an eye on it until it’s ready
- Download to your computer - once it’s ready, click to download it
For Mapping JSON V2:
- Click “Mapping JSON V2” - this starts generating the Mapping Rules JSON V2
- The system processes your mappings - it creates the enhanced JSON V2 format
- You’ll be taken to the Downloads tab - this happens automatically
- Watch the generation progress - keep an eye on it until it’s done
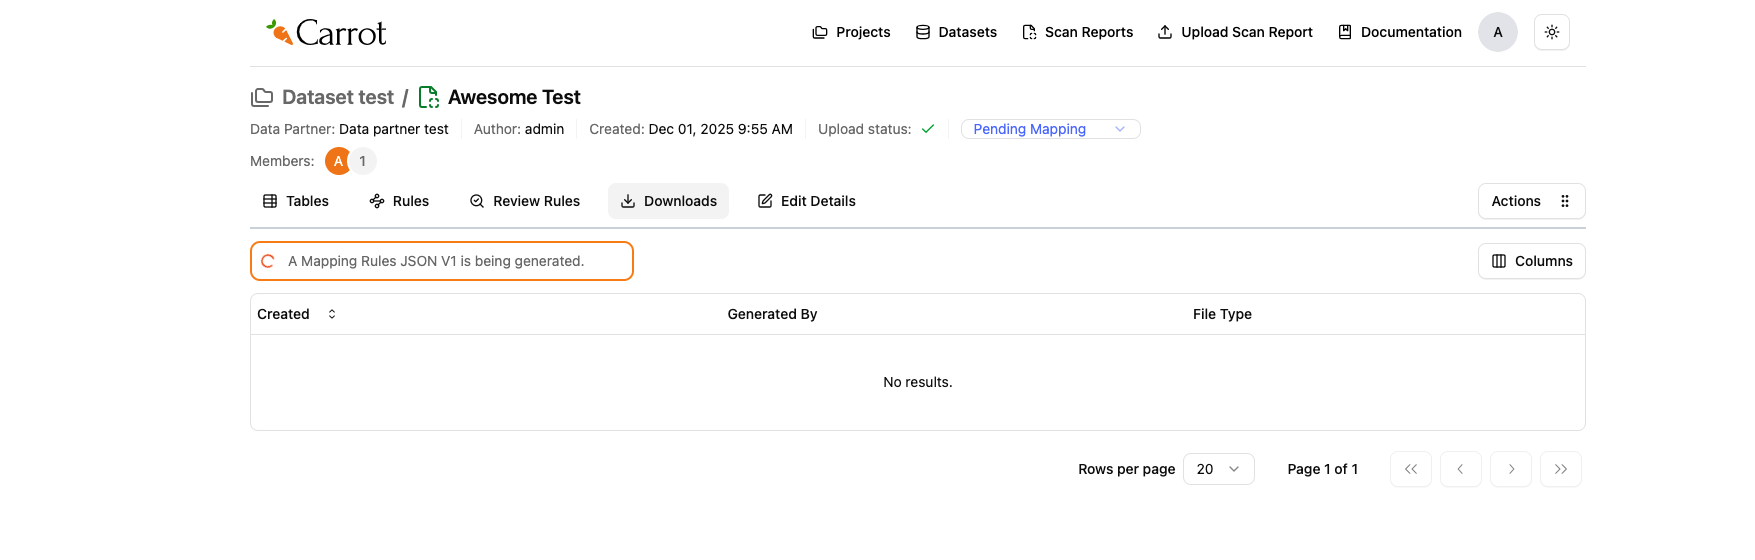
Figure: Downloads Tab - Mapping Rules JSON V2 Generation in Progress
- Download to your computer - once generation is complete, click to download the JSON V2 file
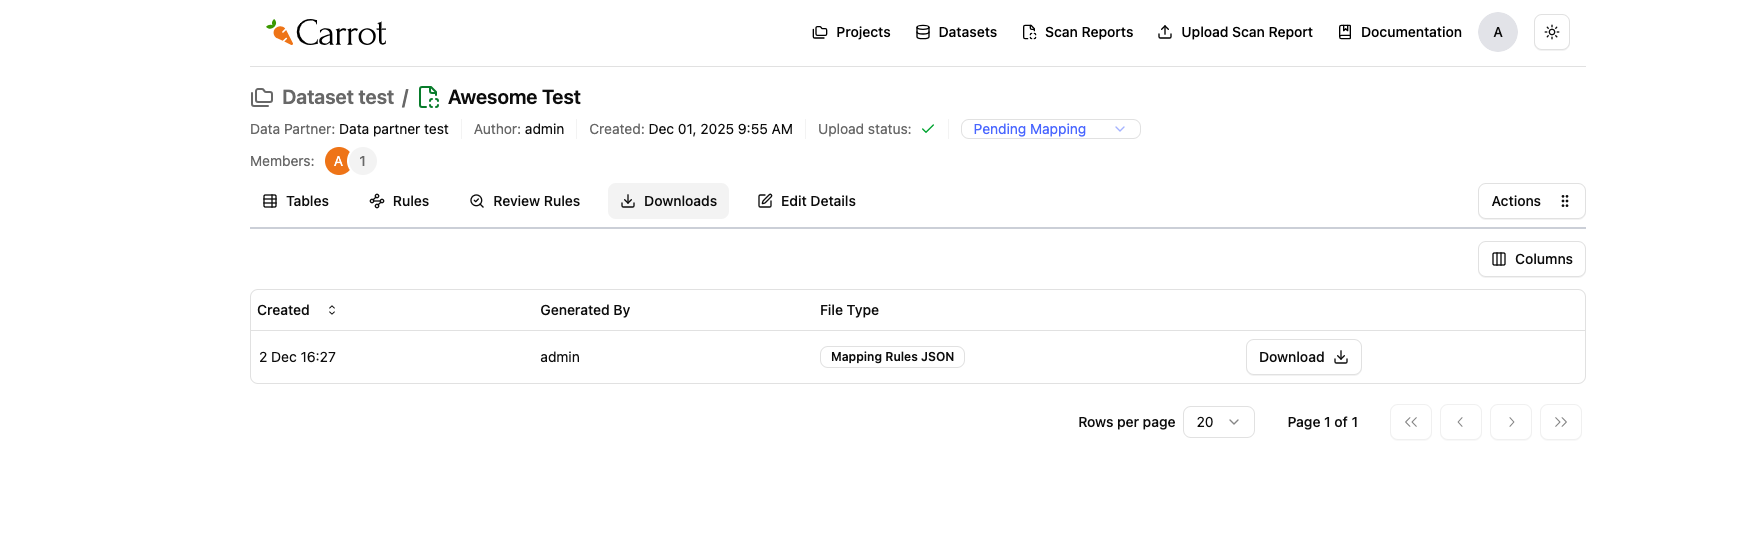
Figure: Ready to download your Mapping Rules JSON file
Note: The download process might take a few minutes depending on how big your mapping configuration.
What’s Next?
Congratulations! You’ve successfully completed the Carrot Mapper workflow. You now have:
- ✅ Uploaded your scan report and data dictionary
- ✅ Configured field mappings for your CSV files
- ✅ Generated transformation rules automatically
- ✅ Reviewed your mappings and rules
- ✅ Downloaded your mapping configuration (JSON)
Your mapping configuration file is now ready to use with Carrot Transform in the next phase of the ETL workflow.
Next: Phase 3: Data Execution with Carrot Transform - Use your mapping configuration to transform your data into OMOP CDM format